Trimble Connect
Trimble Connect can be integrated with VIKTOR using the OAuth 2.0 workflow for token based authentication and authorization. A general introduction to OAuth 2.0 can be found here.
Prerequisites
To create an integration using Trimble Connect, the administrator's email must be an organizational email. Personal emails (e.g., @gmail, outlook, yahoo) are not eligible for API access.
Your organization should have a subscription plan. Go to the Trimble Connect webpage and make sure you have either a "Pro" or "Innovative" plan.
Creating a Project in Trimble Connect
In your Trimble Connect dashboard, you can manage or create a new project. This project will be connected to the VIKTOR application. If there is no project yet, you can click on "New" and fill in the form to create one.
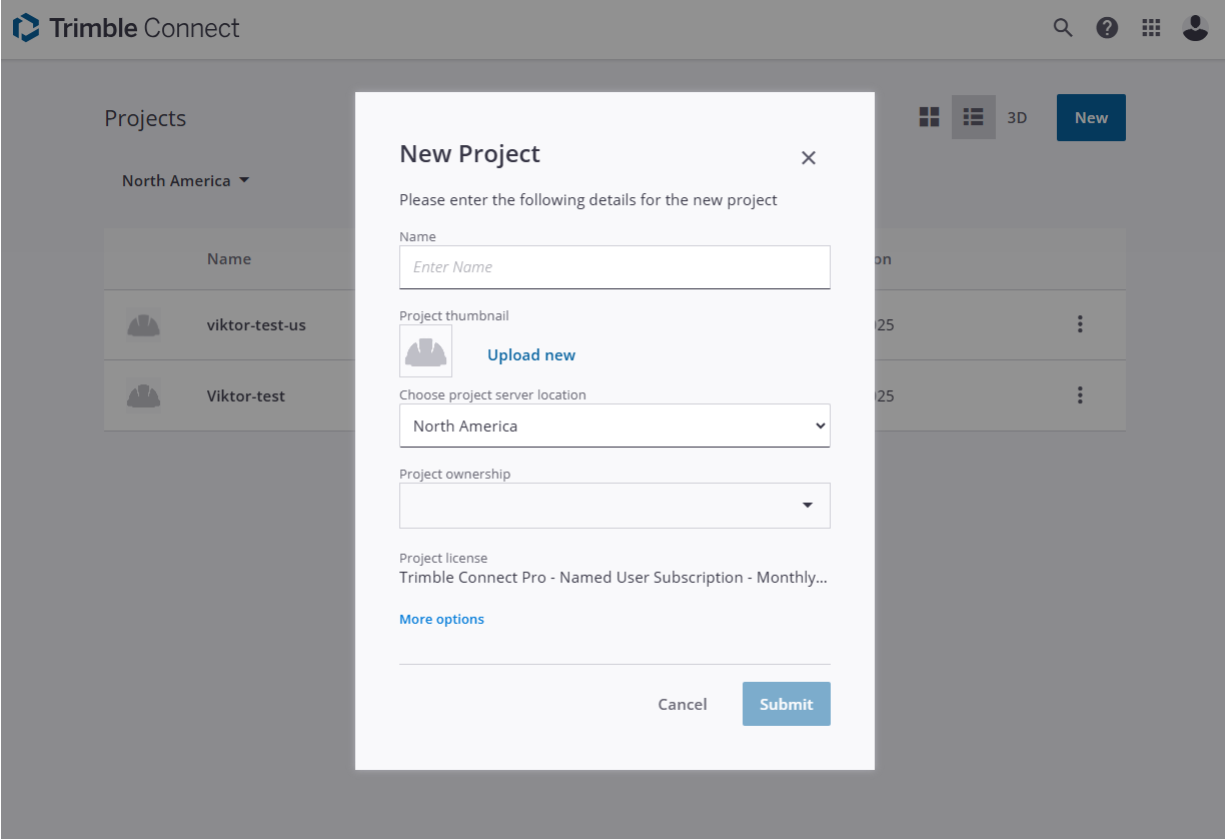
It is important to note the region where the application is hosted because the APIs to use depend on the region, as we will see later.
Request API Credentials
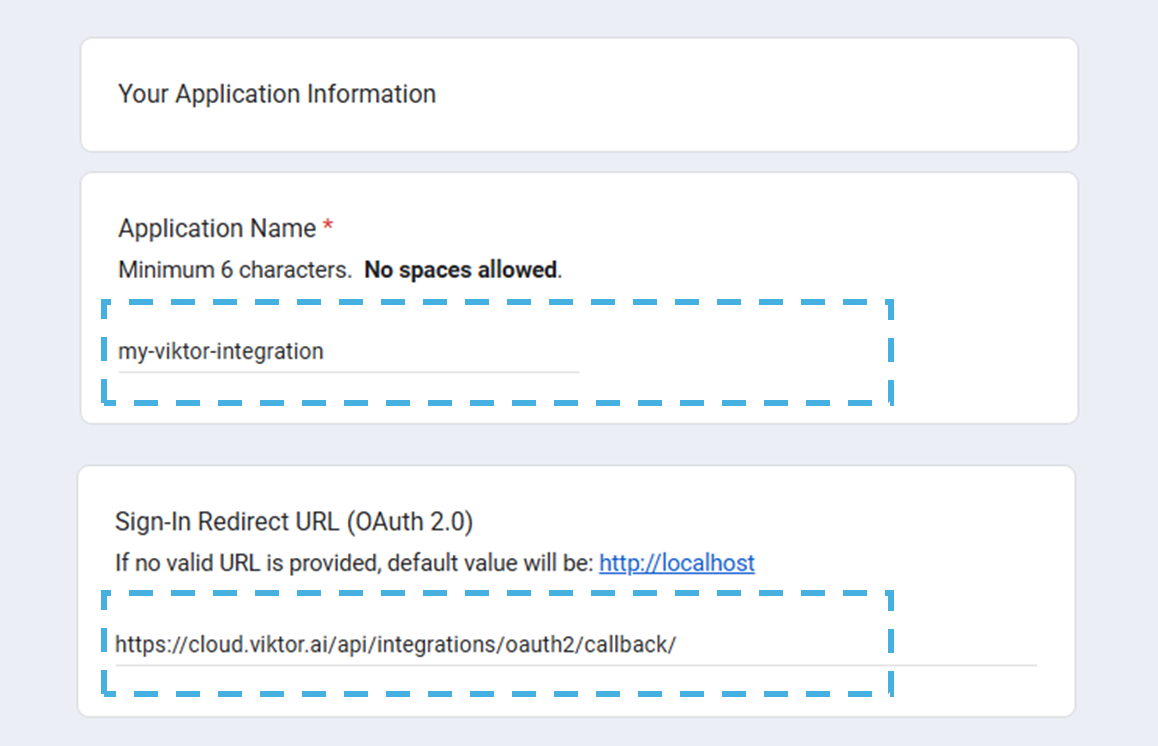
The administrator should go to the Trimble integrations page and request API credentials by filling out this form with your account information, the Application Name, and the Sign-In Redirect URL (OAuth 2.0).
The application name is important because it will be used to request an authorization token. Make sure to use a unique name. For demonstration purposes, the image below uses my-viktor-integration, but make sure to use something unique and specific for your case.
For the Sign-In Redirect URL (OAuth 2.0), you will provide a URL based on your VIKTOR environment.
<your-viktor-environment-url>/api/integrations/oauth2/callback/
Your environment URL should be https://cloud.viktor.ai/ or similar, depending on your organization. As an example, we will use https://cloud.viktor.ai/api/integrations/oauth2/callback/, but make sure to use the proper environment URL.
After filling in the form, you will receive an email from the Trimble support team within the next 72 hours with the following information:
Application Name: my-viktor-integration

Client ID: a1d022e6-....

Client Secret: ese18630...

Callback URLs:
https://cloud.viktor.ai/api/integrations/oauth2/callback/
Make sure to confirm the callback URL matches your environment, otherwise the integration will fail.
Creating an OAuth 2.0 Integration (Admin)
After receiving the Client ID and Client Secret, a VIKTOR admin can generate an OAuth 2.0 integration.
-
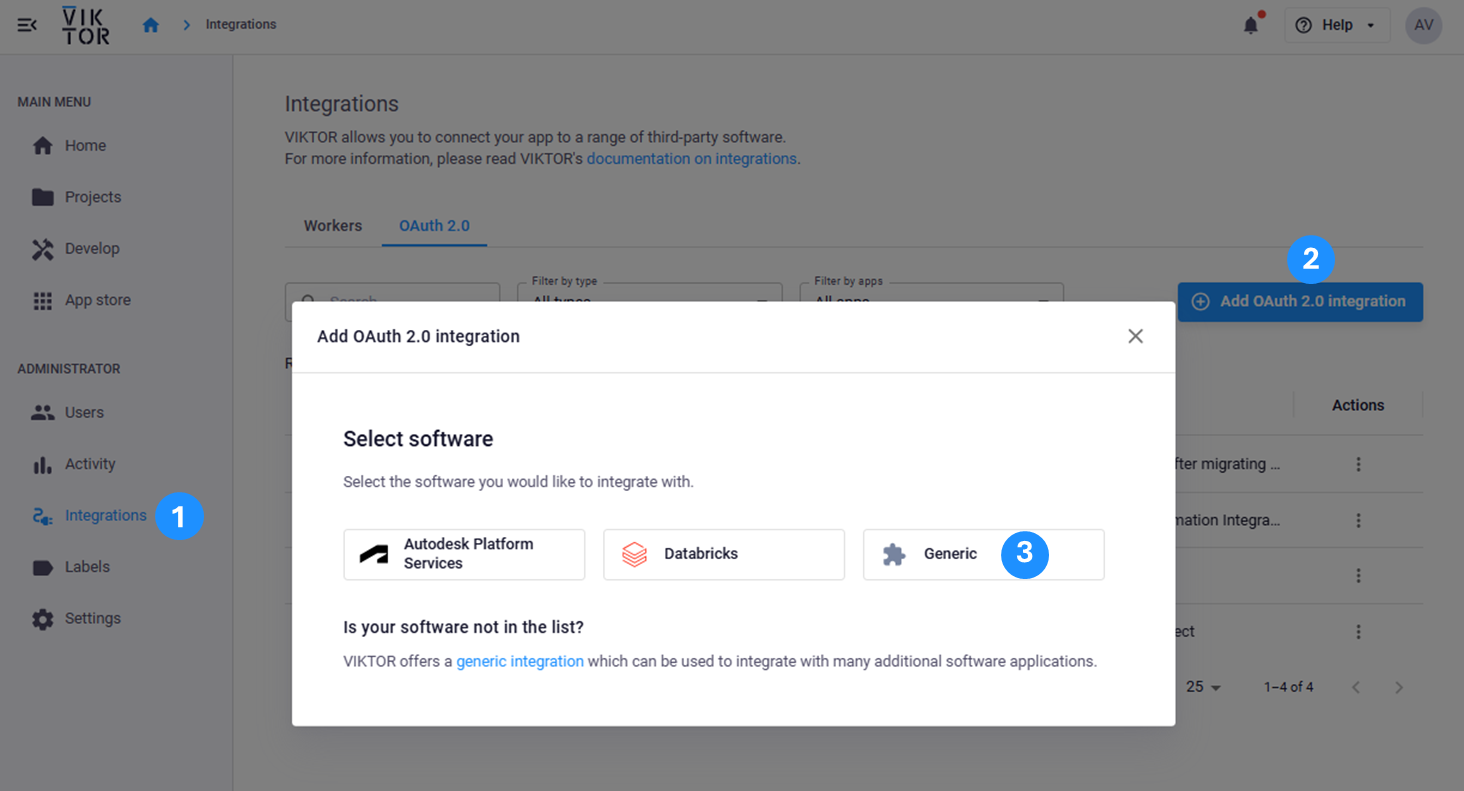
Navigate to the Integrations tab in the Administrator panel.
-
Select the OAuth 2.0 tab.
-
Follow the steps in the modal:
- Select Generic.
- Go to the "Basic Information" tab and fill in the required fields, including the integration name, and select the applications that will use the integration. You can choose to limit the integration to specific apps or allow all apps in the environment to use it.
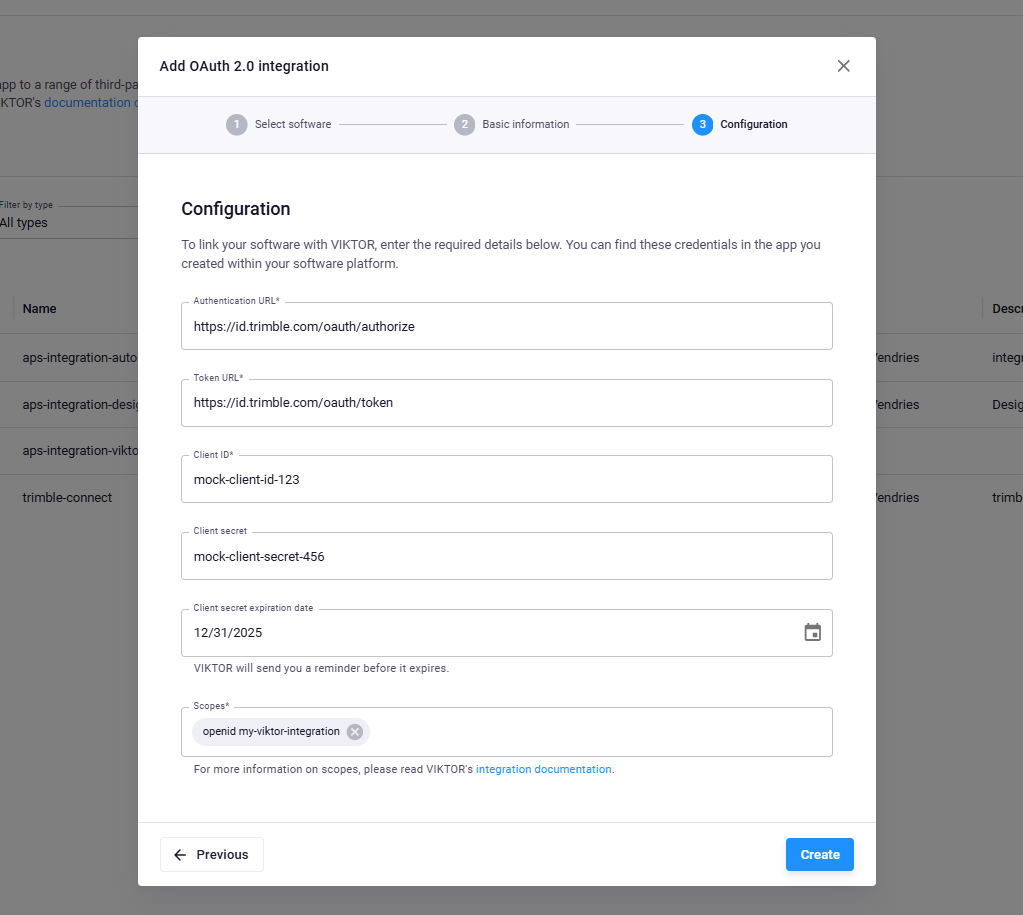
- Then, in the "Configuration" tab, add the Authentication URL and Token URL as follows:
- Authentication URL: https://id.trimble.com/oauth/authorize
- Token URL: https://id.trimble.com/oauth/token
-
Fill in the Client ID and Client Secret from the email you received from Trimble support.
-
For the scope section, you will fill in:
openid <ApplicationName>
As defined in the previous step, for the "my-viktor-integration" application name, the scope will be openid my-viktor-integration.
Implementing the Integration
Once an administrator sets up the OAuth 2.0 integration, the developer can start the implementation. You have two alternatives to develop apps that integrate Trimble Connect:
Using the App Builder
The App Builder provides a no-code approach to create applications with Trimble Connect integration. Simply provide a natural language prompt describing what you want to build, and the App Builder will generate the application for you.
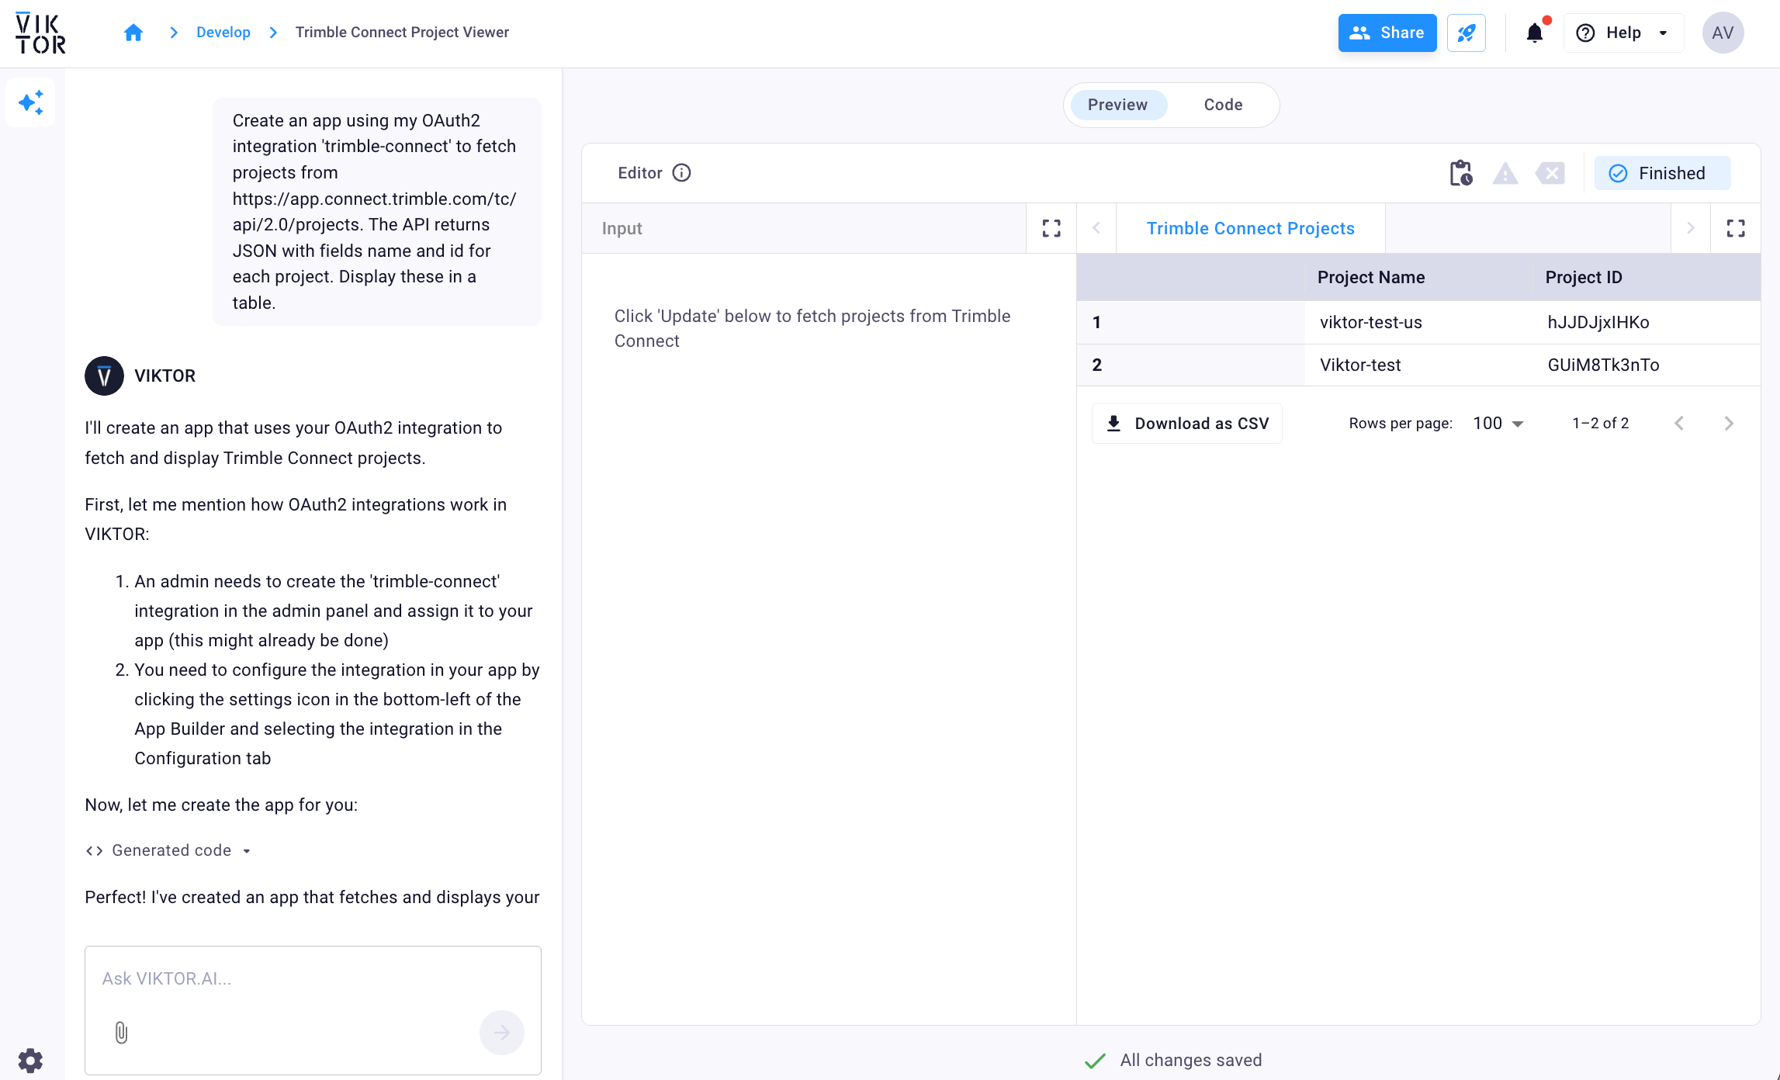
To create an app that lists your projects from your Trimble Connect account, you can run the following prompt (make sure to replace 'my-viktor-integration' with the name of the integration you created in the previous steps):
Create an app using my OAuth2 integration 'my-viktor-integration' to fetch projects from:
URL: https://app.connect.trimble.com/tc/api/2.0/projects

The API returns JSON with fields 'name' and 'id' for each project. Display these in a table.
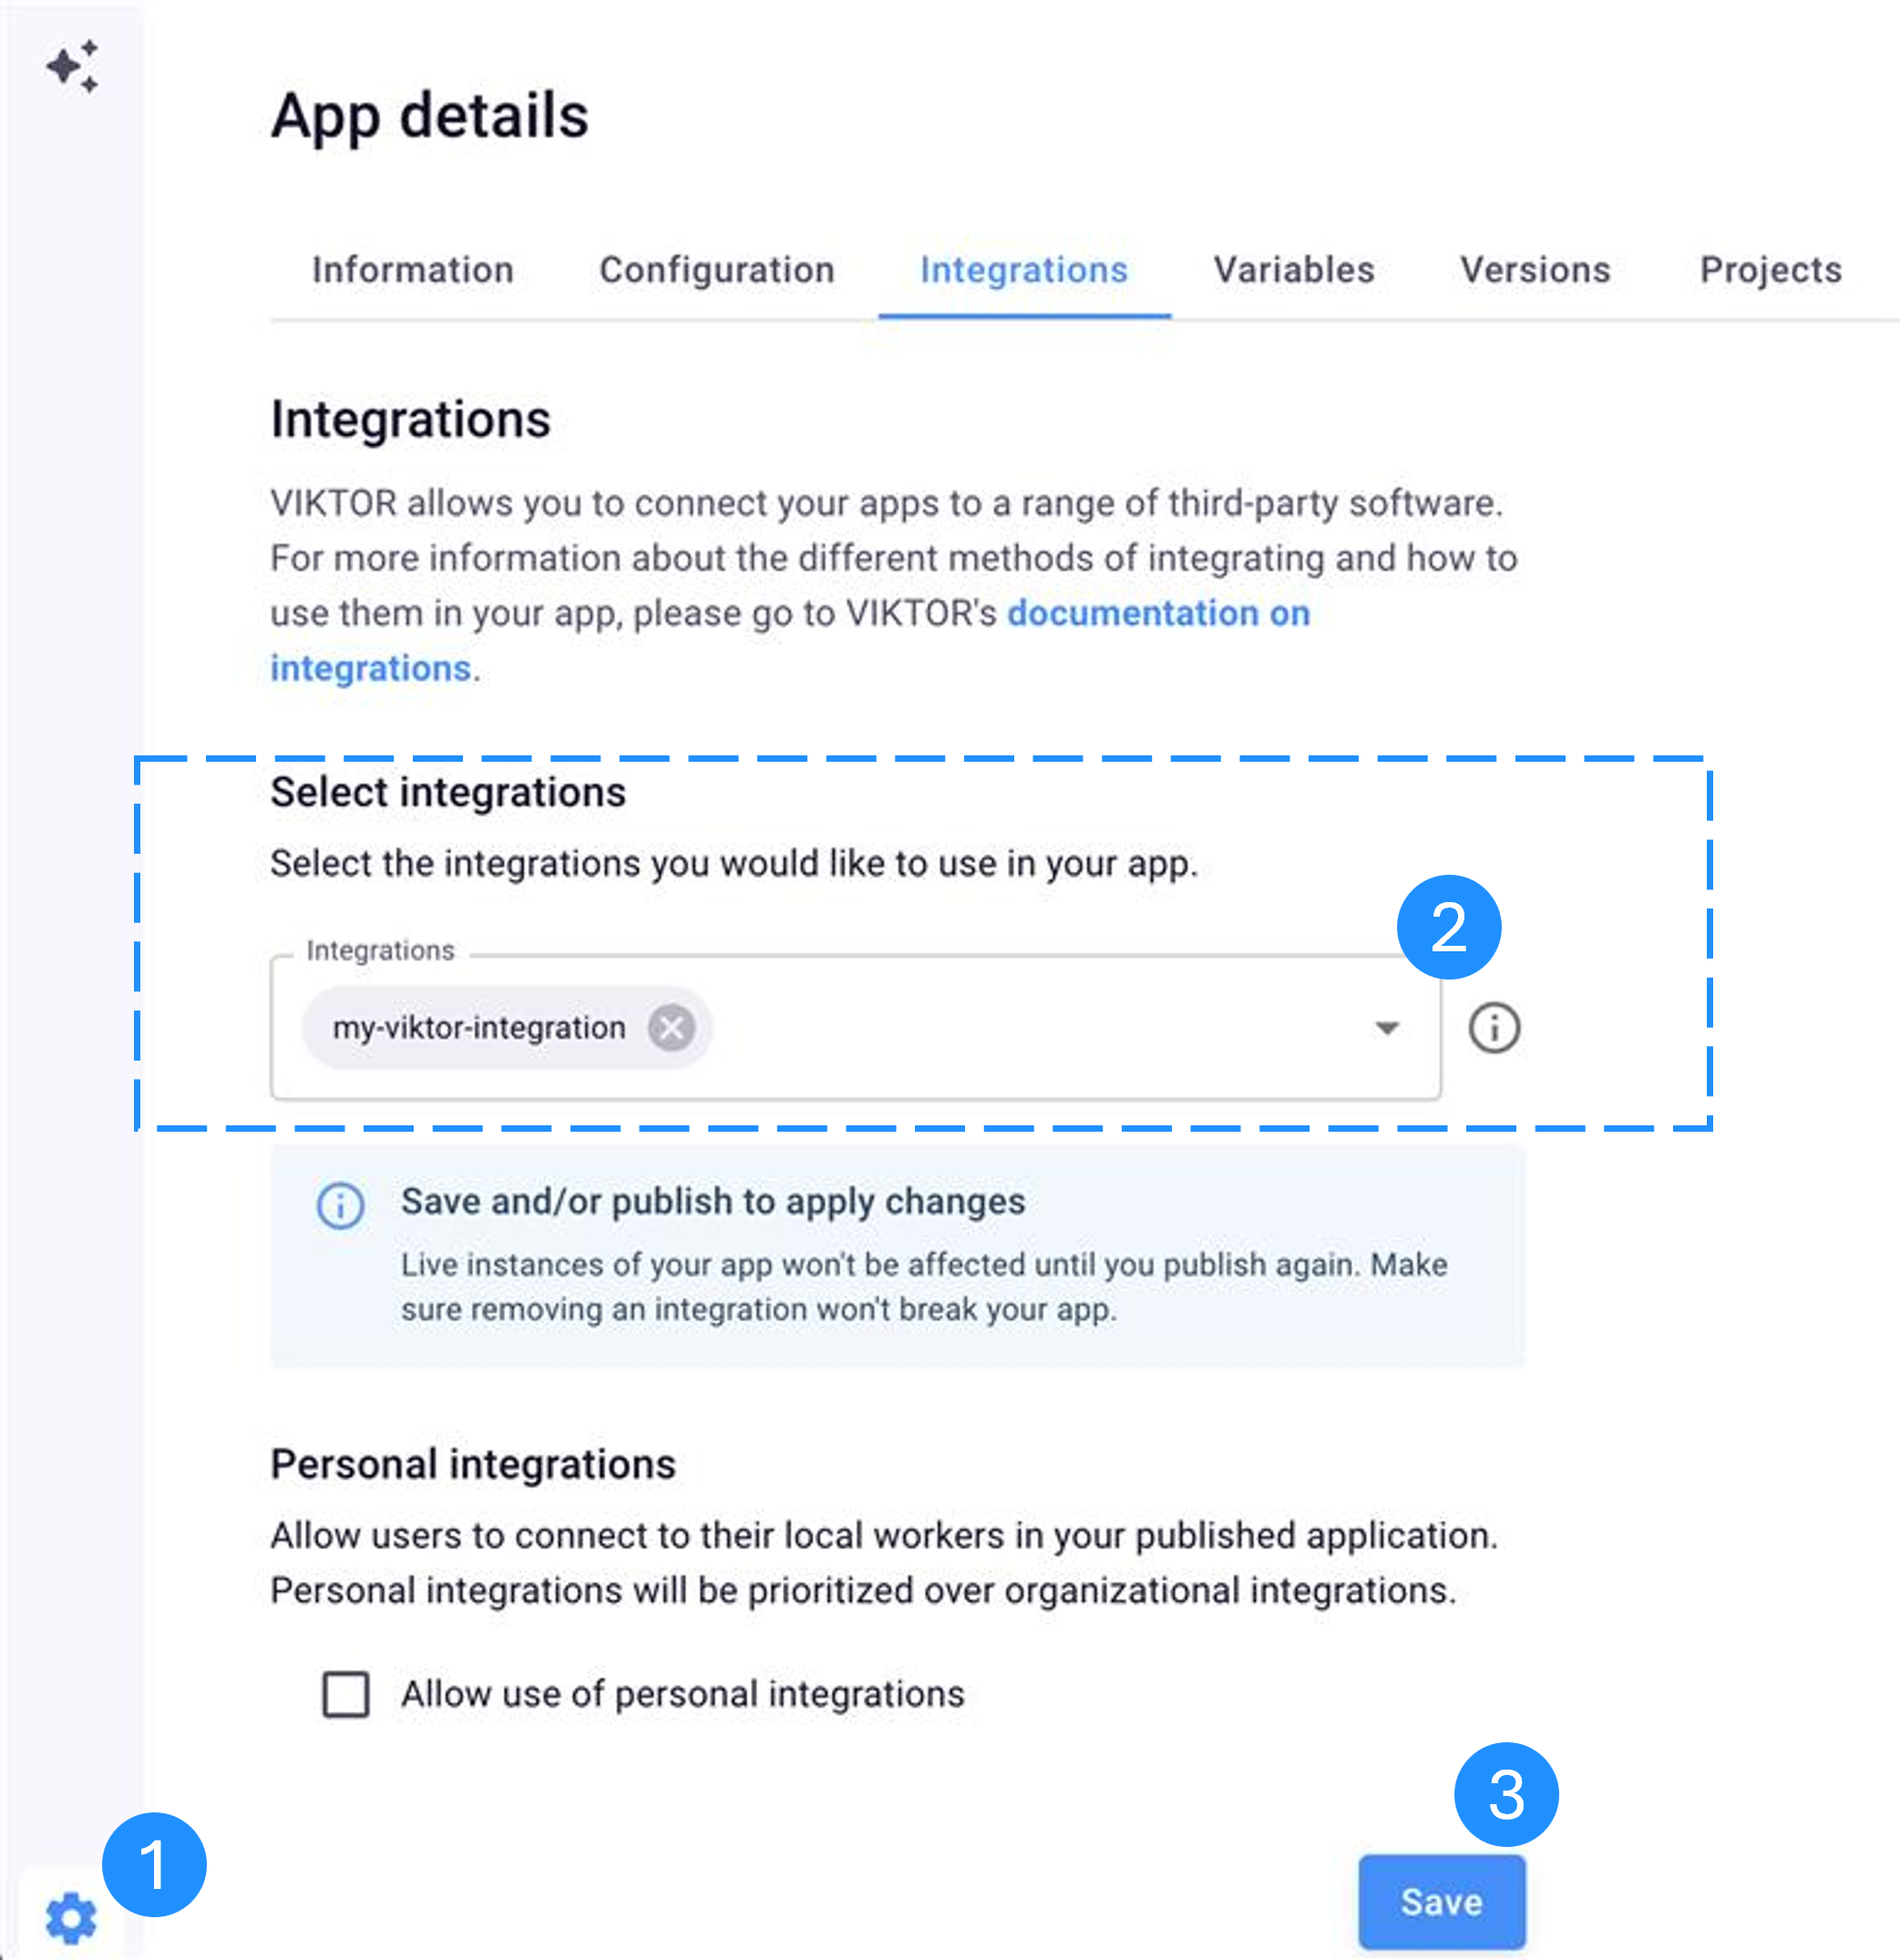
After submitting the prompt, the App Builder will ask you to set up the integration by following these 3 steps:
- Click the 'App details' button
- Select the integration name
- Save the current selection
Finally, the App Builder will generate an application that displays your Trimble Connect projects in a table after you log in. Note that in the example below, "my-viktor-integration" was replaced with a real integration name "trimble-connect".
- You can provide context to the App Builder by adding snippets of the official API documentation to your prompts.
- When creating prompts, make sure to select the correct regional endpoint. For example, if your project is in Europe, use
https://app21.connect.trimble.com/tc/api/2.0/instead of the US endpoint.
Using Local Development
For local development, the developer should add the integration name to the app configuration (after the administrator has assigned the integration to the app). The platform uses it to show a login button when the user opens the app. Make sure your viktor.config.toml contains the name exactly as configured in the Administrator panel, and include an oauth2_integrations entry with the integration name, for example:
viktor.config.toml:
app_type = "editor"
python_version = "3.13"
registered_name = "your-app-name"
oauth2_integrations = [
    "my-viktor-integration"
]
Then implement the logic that uses the integration in the code. You can use raw REST requests or a Python SDK, as long as it is compatible with the VIKTOR OAuth flow. A popular library is requests. You can add it in your requirements.txt to use it in the application.
viktor
requests
To obtain an access token, instantiate OAuth2Integration with the integration name and call get_access_token. Below is a short example showing how to retrieve the user's available projects and display them in a TableView. It works when the VIKTOR OAuth 2.0 integration is assigned to your app and the user has granted access:
The example uses the US API endpoint. Trimble Connect has different API endpoints depending on your region:
- US (North America):
https://app.connect.trimble.com/tc/api/2.0/ - Europe:
https://app21.connect.trimble.com/tc/api/2.0/ - Asia:
https://app31.connect.trimble.com/tc/api/2.0/
Make sure to use the correct endpoint URL based on where your Trimble Connect project is hosted. For example, if your project is in Europe, replace the endpoint in the code with https://app21.connect.trimble.com/tc/api/2.0/projects.
import viktor as vkt
import requests

class Parametrization(vkt.Parametrization):
    text = vkt.Text("# Trimble Connect OAuth2 Integration")

class Controller(vkt.Controller):
    parametrization = Parametrization

    @vkt.TableView("Get Trimble Connect Projects")
    def get_projects(self, params, **kwargs):
        integration = vkt.external.OAuth2Integration("my-viktor-integration")
        token = integration.get_access_token()

        headers = {"Authorization": f"Bearer {token}"}
        # This endpoint is for US-based projects. See the Regional API Endpoints section below for Europe and Asia.
        endpoint = "https://app.connect.trimble.com/tc/api/2.0/projects"
        response = requests.get(endpoint, headers=headers, timeout=15)
        response.raise_for_status()

        projects = response.json()

        data = []
        for project in projects:
            project_name = project.get("name", "")
            project_id = project.get("id", "")
            data.append([project_name, project_id])

        return vkt.TableResult(data, column_headers=["Project Name", "ID"])
The integration name in OAuth2Integration must match the value in viktor.config.toml. Make sure the user has access to Trimble Connect projects in the connected account.