Creating a tree-type app
In this tutorial we will create an application that implements a 'tree' entity type hierarchy, consisting of two
entity types (with parent-child relation). The child entity type
allows the user to click on a map to define a GeoPoint. The parent entity type collects the locations on each child
entity and shows them together on a single map, making use of the API.
The end result can be downloaded here.
For more examples of applications, please visit the sample apps
Creating an empty app
Let's create, install and start an empty app. This will be the starting point for the rest of the tutorial.
But before we start, make sure to shut down any app that is running (like the demo app) by closing the command-line shell
(for example Powershell) or end the process using Ctrl + C.
Follow these steps to create, install and start an empty app:
-
Open a terminal and run the following command to create the app on the VIKTOR platform and generate the initial code locally:
viktor-cli create-app "Tree tutorial" --init --app-type tree -
Open the newly created folder in your code editor and run
viktor-cli clean-startin the terminal to install dependencies and connect the app to the platform.
If all went well, your empty app is installed and connected to your development workspace. Do not close the terminal as this will break the connection with your app. The terminal in your code editor should show something like this:
INFO    : Connecting to cloud.viktor.ai...
INFO    : Connection is established (use Ctrl+C to close)
INFO    :
INFO    : Navigate to the link below to see your app in the browser
INFO    :     https://cloud.viktor.ai/workspaces/XXX/app
INFO    :
INFO    : App code loaded, waiting for jobs...
- You only need to create an app template and install it once for each new app you want to make.
- The app will update automatically once you start adding code in
app.py, as long as you don't close the terminal or your code editor. - Did you close your code editor? Use
viktor-cli startto start the app again. No need to install, clear, etc.
Folder structure
The app has the following folder structure:
tree-tutorial
├── app
│   ├── my_entity_type
│   │   ├── __init__.py
│   │   └── controller.py
│   ├── my_folder
│   │   ├── __init__.py
│   │   └── controller.py
│   └── __init__.py
├── CHANGELOG.md
├── README.md
├── requirements.txt
├── tests
│   └── __init__.py
└── viktor.config.toml
Note that the app type ('tree') has been defined in viktor.config.toml:
app_type = 'tree'
To keep things simple, we will stick to the current entity type and corresponding folder names within this tutorial.
Installation
Login to the app in your browser to verify that the app is installed and running as expected. You will be redirected to the app's dashboard.
If you see the "Workspaces" menu upon logging in, click the "Open" button on the "Development" workspace. After opening, you will be redirected to the app's dashboard.
The tree-type app generated by the CLI consists of a top folder, called "My Folder", shown in the sidebar on the left side of the screen.
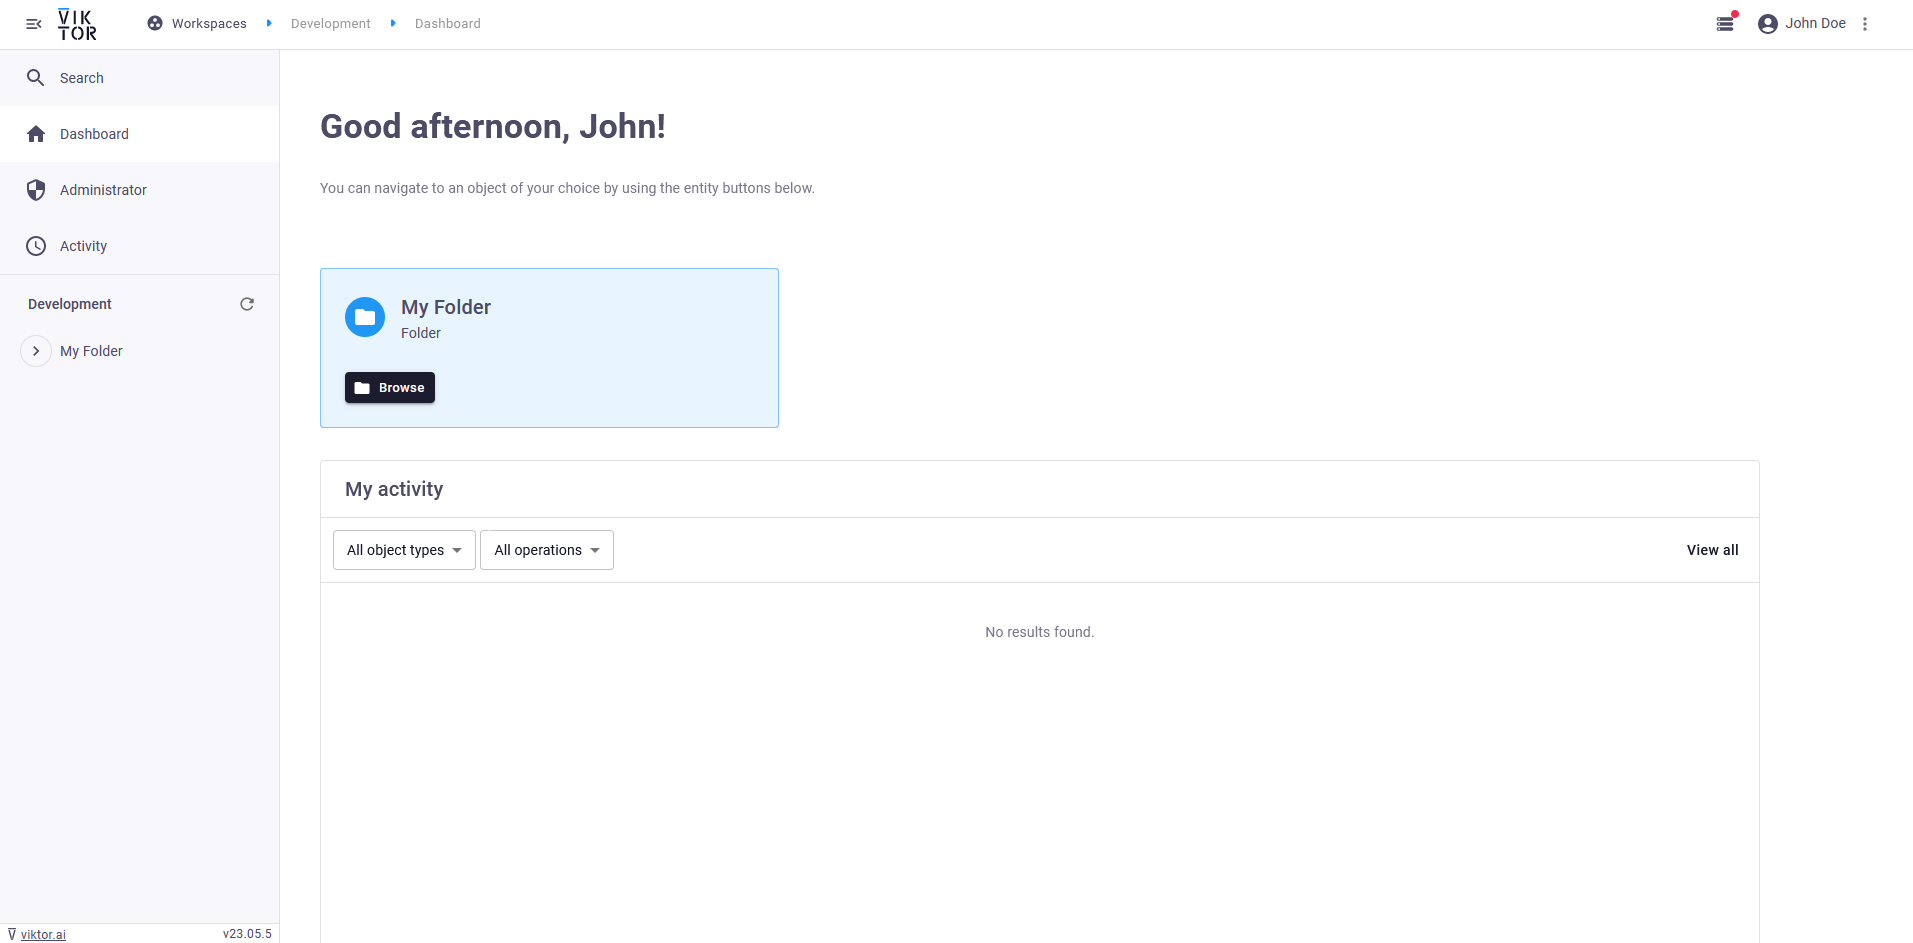
Click "My Folder" to enter the folder. Now, let's add a new object by clicking the + (create new object) button on the right side of the screen. You'll now see a menu where you can add a new object:
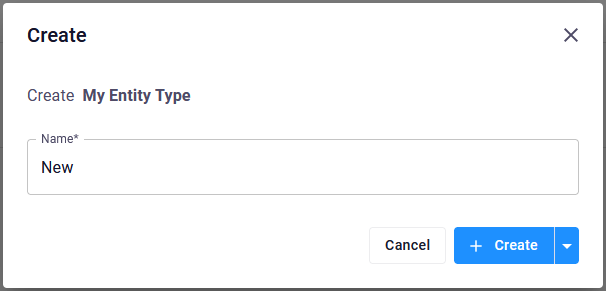 Create a new object of type "My Entity Type"
Provide a name for the new object and click "Create and open", to create the new object and automatically navigate to the object's editor (it should be empty). From here, you can navigate back to "My Folder" in a few different ways:
-
By clicking the back button in the top right side of the screen:

-
By clicking the menu button in the top left corner of the screen. This will extend (or collapse) the side menu. You can expand "My Folder" to see all containing objects, or click on it:

-
By clicking the breadcrumbs at the top of the screen:

Delete the created entity afterwards.
Defining the GeoPoint (child)
Let's modify MyEntityType so that the user can define a GeoPoint on a map. Open app/my_entity_type/controller.py
and replace it with the following code:
import viktor as vkt


class Parametrization(vkt.Parametrization):
    geo_point = vkt.GeoPointField("Select point")


class Controller(vkt.Controller):
    parametrization = Parametrization

    @vkt.MapView("Map")
    def map_view(self, params, **kwargs):
        features = []

        if params.geo_point:
            features.append(vkt.MapPoint.from_geo_point(params.geo_point))

        return vkt.MapResult(features)
In your browser, open "My Folder" and create a few entities of type "My geo-point". Don't forget to select a point on the map for each of them and save (including the entity created at the start of this tutorial, if you did not delete it before).
Defining the Overview (parent)
To show all the geo-points we just created, let's modify MyFolder to iterate over all its children and obtain the
point from the params for each of them. Open app/my_folder/controller.py and replace it with the following code:
import viktor as vkt


class Controller(vkt.Controller):
    label = 'Overview'
    children = ['MyEntityType']
    show_children_as = 'Table'

    @vkt.MapView("Map")
    def map_view(self, params, entity_id, **kwargs):
        features = []

        for child in vkt.api_v1.API().get_entity(entity_id).children():
            point = child.last_saved_params.geo_point

            if point:
                features.append(vkt.MapPoint.from_geo_point(point))

        return vkt.MapResult(features)
In your browser, open the editor of "My Folder". Within the "Map" view, click the 3 dots and select "Center map", to fit all objects within the view. You should now be able to see all your previously created geo-points.