Show HTML
For visualizations using Plotly, it is recommended to use the
dedicated PlotlyView.
This guide explains how to add a WebView to an editor. This could for instance be used to
incorporate interactive visualizations or present other dynamic or static HTML (web)
content:
Implementation
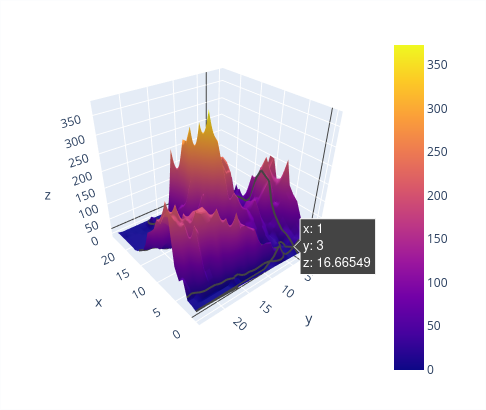
 Example of how an interactive visualization in a web view could look like (source: plot.ly)
There are 3 ways to pass the HTML content to a WebResult:
- From a URL
- From a static HTML file
- From a dynamic HTML content
From a URL
You can point to a live URL and use that HTML page:
import viktor as vkt


class Controller(vkt.Controller):

    @vkt.WebView('Python wiki')
    def get_web_view(self, params, **kwargs):
        return vkt.WebResult(url='https://en.wikipedia.org/wiki/Python_(programming_language)')
From a static HTML file
If the HTML page is always the same (it is not necessary to generate it on every call), use the from_path method to
construct a WebResult:
import viktor as vkt
from pathlib import Path


class Controller(vkt.Controller):

    @vkt.WebView('Hello page')
    def get_web_view(self, params, **kwargs):
        static_html_path = Path(__file__).parent / 'page.html'
        return vkt.WebResult.from_path(static_html_path)
page.html (in this example next to controller.py):
<html>
  Hello Everyone!
</html>
From dynamic HTML content
If the HTML page is dependent on some input (so needs to be generated on every call), use the html argument in
WebResult:
import viktor as vkt
from io import StringIO


class Controller(vkt.Controller):

    @vkt.WebView('Hello page')
    def get_web_view(self, params, **kwargs):
        name = 'John Doe'
        html_text = f'<html>Hello {name}</html>'
        return vkt.WebResult(html=html_text)
A web view can be combined with a data view using a WebAndDataView.
Interactive visualizations
A very useful application of the web view is for interactive visualizations (for instance maps/graphs).
VIKTOR JavaScript SDK
VIKTOR provides a JavaScript SDK which can be used directly in a web view. With this SDK it is possible to fill the
parametrization with inputs when a user clicks on a button in the view. To achieve this, you will need to import
the SDK using and subsequently call the function viktorSdk.sendParams. This function accepts a dictionary of
field names and corresponding values which are applied on the parametrization.
An example HTML file looks like this:
<!DOCTYPE html>
<html lang="en">
<head>
  <meta charset="UTF-8">
  <meta name="viewport" content="width=device-width, initial-scale=1.0">
  <style>
    * { font-family: sans-serif; }
    button { padding: 8px 16px; outline: 0; border: 0; background: #1e90ff; color: #fff; cursor: pointer; border-radius: 4px; }
  </style>
  <script src=VIKTOR_JS_SDK></script>
  <script>
    function sendName() {
      viktorSdk.sendParams({
        hello: "VIKTOR"
      });
    }

  </script>
</head>
<body>
  <button onclick="sendName()">Send name</button>
</body>
</html>
In the example above the source of the JavaScipt SDK is set by means of the variable VIKTOR_JS_SDK.
You set it using the environment variable VIKTOR_JS_SDK_PATH, that is available automatically in
your app's logic. This means dat you do not need to set it using the viktor-cli (>v0.41.0) or
in your app settings. The example below shows how to properly reference the JavaScript SDK:
import viktor as vkt
import os
from pathlib import Path


class Parametrization(vkt.Parametrization):
    hello = vkt.TextField("Hello")


class Controller(vkt.Controller):
    parametrization = Parametrization

    @vkt.WebView('Web View')
    def get_web_view(self, params, **kwargs):
        html = (Path(__file__).parent / 'example.html').read_text()
        html = html.replace("VIKTOR_JS_SDK", os.environ["VIKTOR_JS_SDK_PATH"] + "v1.js")
        return vkt.WebResult(html=html)
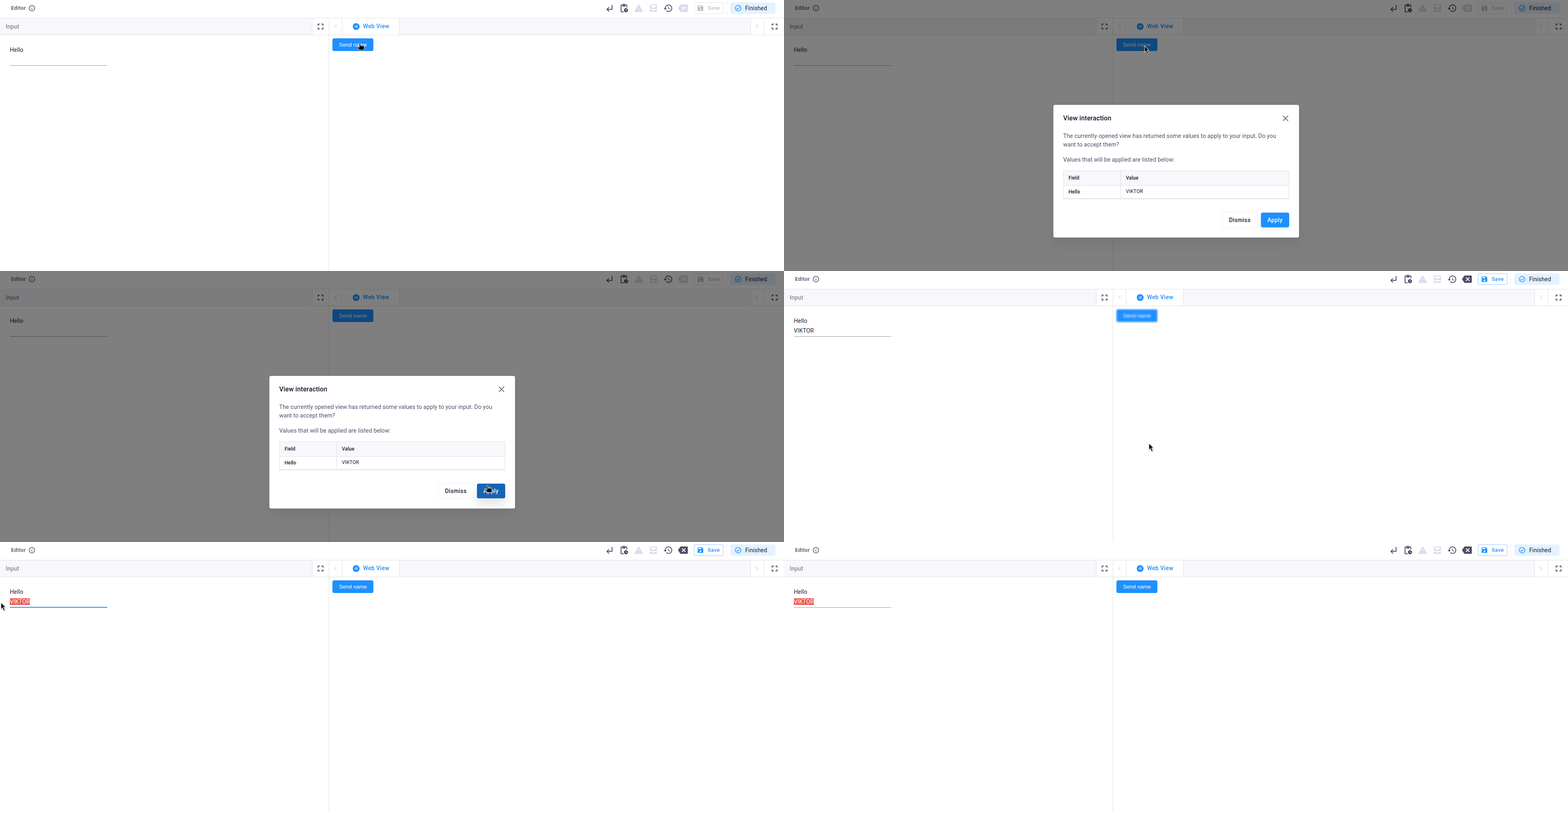
Above example.html and app code will result in the following interactive view:

By default, a confirmation pop-up is shown. To bypass the confirmation pop-up and set parameters immediately, add an extra argument set to true:
...
    function sendName() {
      viktorSdk.sendParams({
        hello: "VIKTOR"
      }, true);
    }
...
- To set fields nested under a
Page,Step,TaborSectionyou can either return a nested object or use the dotted path (e.g."tab.section.hello") in thesendParamsmethod. - Keep in mind that the
sendParamsfunction only accepts the serialized values. For example, the value of aColorFieldis sent as:viktorSdk.sendParams({
color: {r: 30, g: 144, b: 255}
});
Show all fields
viktorSdk.sendParams({
  number: 12.3,
  integer: 12,
  text: "abcd",
  textarea: "defg",
  date: "2006-01-02",
  bool: true,
  select: "Green",
  autocomp: "Green",
  multiselect: ["Red", "Green"],
  table: [{c1: 1, c2: 2}, {c1: 3, c2: 4}],
  geopoint: {lat: 25.7617, lon: -80.1918},
  geopolyline: [{lat: 25.7617, lon: -80.1918}, {lat: 18.4655, lon: -66.1057}],
  geopolygon: [{lat: 25.7617, lon: -80.1918}, {lat: 18.4655, lon: -66.1057}, {lat: 32.3078, lon: -64.7505}],
  entity: 123, // entity id
  color: {r: 30, g: 144, b: 255}
});
Python libraries
The following Python libraries offer the functionality to export interactive visualizations as an HTML page:
Testing
mock_View decorator for easier testing of view methods
Methods decorated with @WebView or @WebAndDataView need to be
mocked within the context of (automated) testing.
import unittest

from viktor.testing import mock_View

from app.my_entity_type.controller import MyEntityTypeController

class TestMyEntityTypeController(unittest.TestCase):

    @mock_View(MyEntityTypeController)
    def test_web_view(self):
        params = ...
        result = MyEntityTypeController().web_view(params=params)
        self.assertEqual(result.html, ...)