Explore our maps
In this task you will learn how to visualize data on a map in your VIKTOR app. We also look into some interactive map features that VIKTOR offers out of the box!
Set up the app template
When you start creating a new app the first thing you need to do is to create an app template. The steps depend on the installation method you chose before. Please select the correct tab before you continue.
- Local development
- GitHub Codespaces
-
Open the Codespace (only if you don't have it open yet)
-
In the terminal enter the following command to create the necessary files and hit enter:
viktor-cli create-app --app-type editor -
Install the app and its dependencies and connect it to the VIKTOR platform:
viktor-cli clean-start
If all went well and the app is connected you will see the VIKTOR logo in the terminal:
INFO    :  __      __ __  __  __
INFO    :  \ \    / / | | | |/ /
INFO    :   \ \  / /  | | | ' /
INFO    :    \ \/ /   | | |  <
INFO    :     \  /    | | | . \
INFO    :      \/     |_| |_|\_\
INFO    :   _______   ____    _____
INFO    :  |__   __| / __ \  |  __ \
INFO    :     | |   | |  | | | |__) |
INFO    :     | |   | |  | | |  _  /
INFO    :     | |   | |__| | | | \ \
INFO    :     |_|    \____/  |_|  \_\
INFO    : VIKTOR connector vX.Y.Z
INFO    : VIKTOR SDK vX.Y.Z
INFO    : Connecting to platform...
INFO    : Connection is established: <URL>  <---- here you can see your app
INFO    : The connection can be closed using Ctrl+C
INFO    : App is ready
Do not close the terminal as this will break the connection with your app.
-
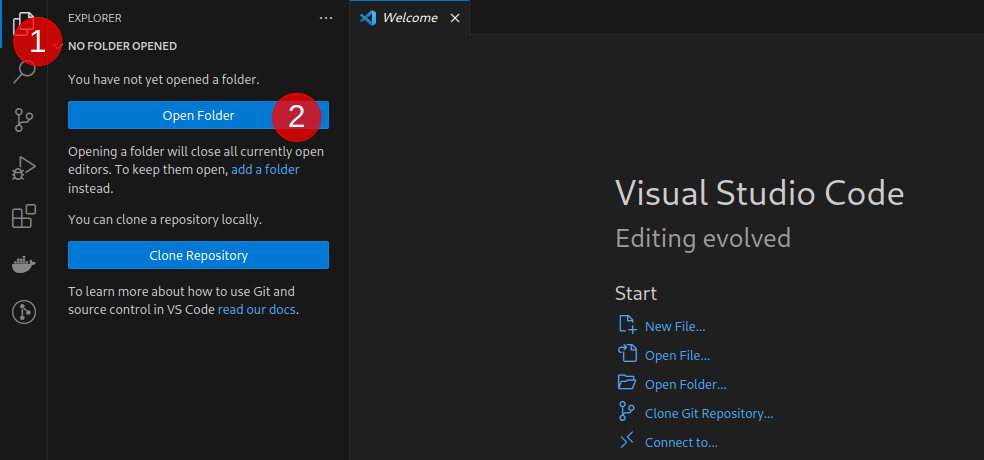
You will need a code editor to write the code of your app. Download and install a code editor if you don't have one installed on your computer. We recommend using VS Code or PyCharm.
-
Create a new folder on your computer that you will use to store the code of your app (e.g.
C:\Users\<username>\viktor-apps\my-app). -
Open your code editor and open the folder you just created in the previous step. Select the correct tab below and see how to do this in the code editor of your choice.
- VS Code
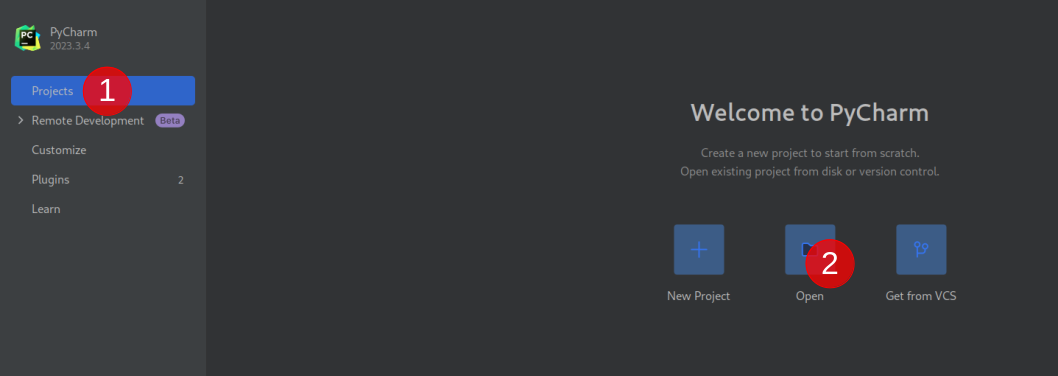
- PyCharm
-
Open a terminal in your code editor:
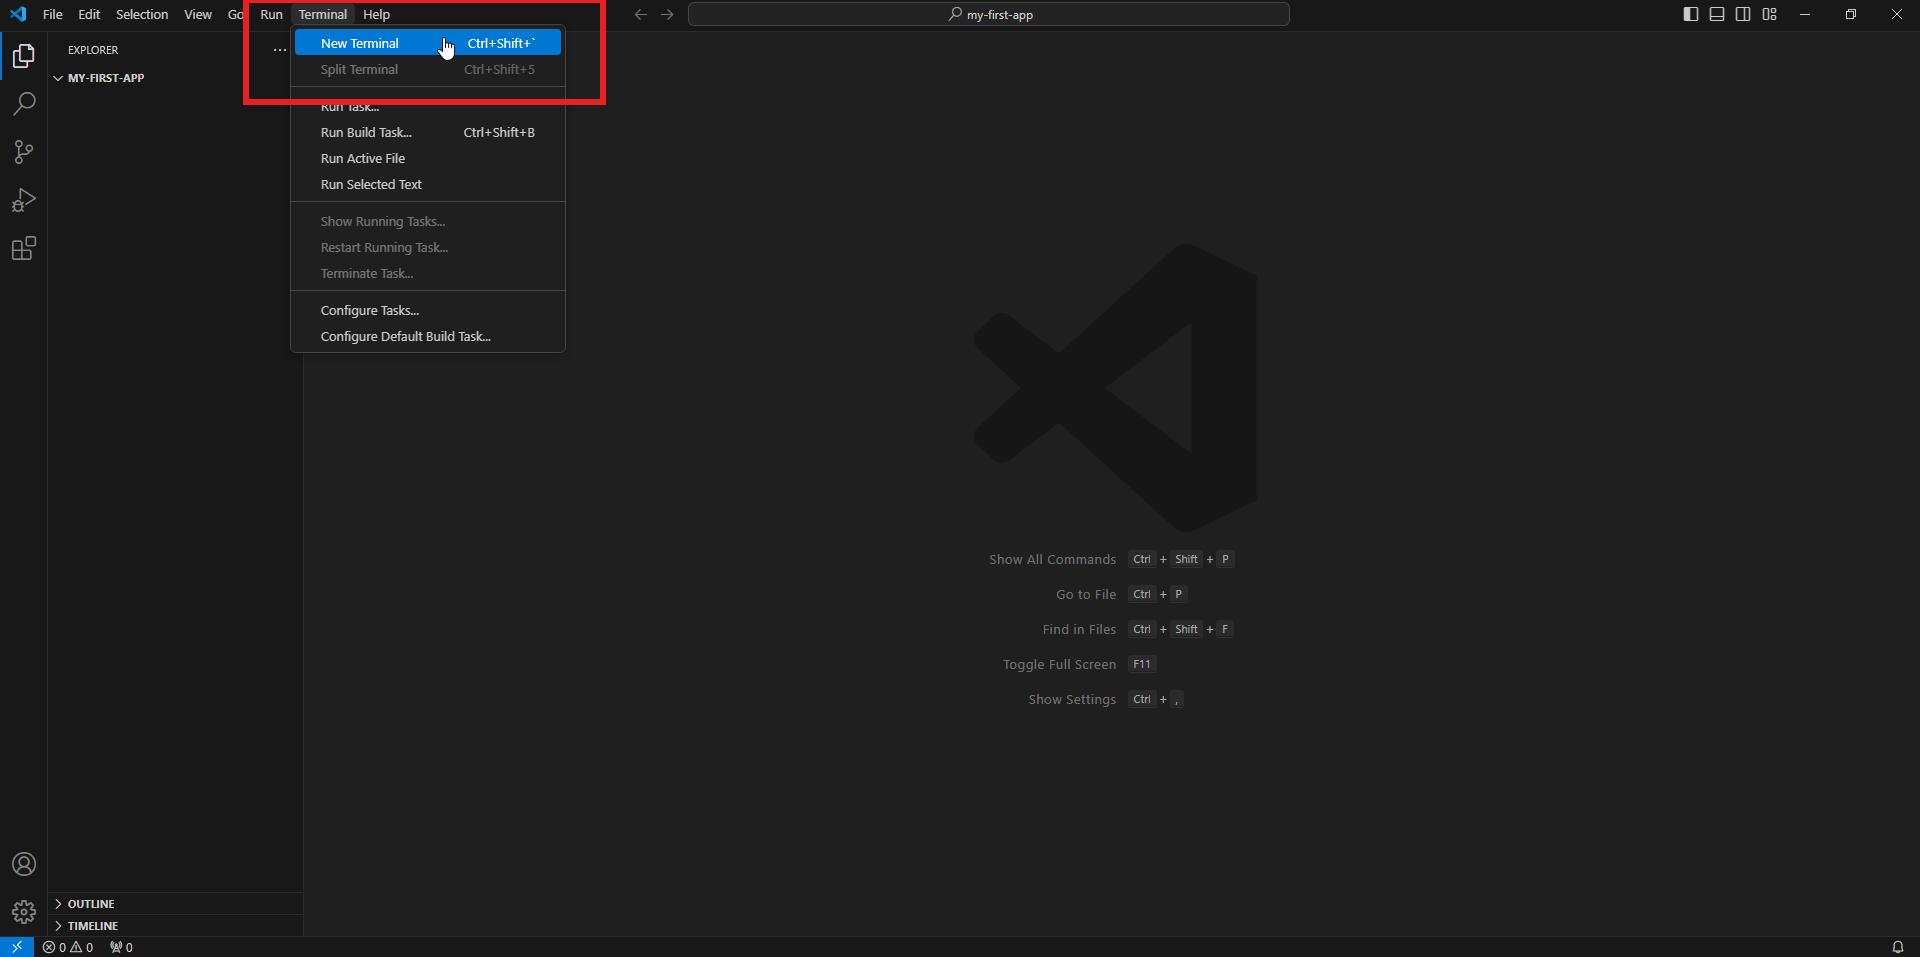
Inside that terminal enter the following command to generate the necessary app files and hit enter:
viktor-cli create-app --app-type editorviktor-cli not recognizedIf you activated your account, continued with the starter guide and installed a code editor in the same session you might encounter the following error:
viktor-cli : The term 'viktor-cli' is not recognized as the name of a cmdlet, function, script file, or operable program. Check the spelling of the name, or if a path was included, verify that the path
is correct and try again.
At line:1 char:1
+ viktor-cli
+ ~~~~~~~~~~
    + CategoryInfo          : ObjectNotFound: (viktor-cli:String) [], CommandNotFoundException
    + FullyQualifiedErrorId : CommandNotFoundException
You can solve this error by closing and restarting your code editor. After doing so you can run the command without any problems. The problem is caused because your code editor inherits the environment variables of the process that launched it and because you installed the VIKTOR CLI in the same session it requires a restart to be recognized properly.
-
Install the app and its dependencies and connect it to the VIKTOR platform by using the following command in the terminal:
viktor-cli clean-start
Running this command can take a few minutes. When the installation is complete you will see the following lines printed in the terminal. This means that the app is connected to the VIKTOR platform.
INFO    :  __      __ __  __  __
INFO    :  \ \    / / | | | |/ /
INFO    :   \ \  / /  | | | ' /
INFO    :    \ \/ /   | | |  <
INFO    :     \  /    | | | . \
INFO    :      \/     |_| |_|\_\
INFO    :   _______   ____    _____
INFO    :  |__   __| / __ \  |  __ \
INFO    :     | |   | |  | | | |__) |
INFO    :     | |   | |  | | |  _  /
INFO    :     | |   | |__| | | | \ \
INFO    :     |_|    \____/  |_|  \_\
INFO    : VIKTOR connector vX.Y.Z
INFO    : VIKTOR SDK vX.Y.Z
INFO    : Connecting to platform...
INFO    : Connection is established: <URL>  <---- here you can see your app
INFO    : The connection can be closed using Ctrl+C
INFO    : App is ready
Do not close the terminal as this will break the connection with your app.
-
Open a terminal in your code editor:

Inside that terminal enter the following command to generate the necessary app files and hit enter:
viktor-cli create-app --app-type editor -
Install the app and its dependencies and connect it to the VIKTOR platform by using the following command in the terminal:
viktor-cli clean-start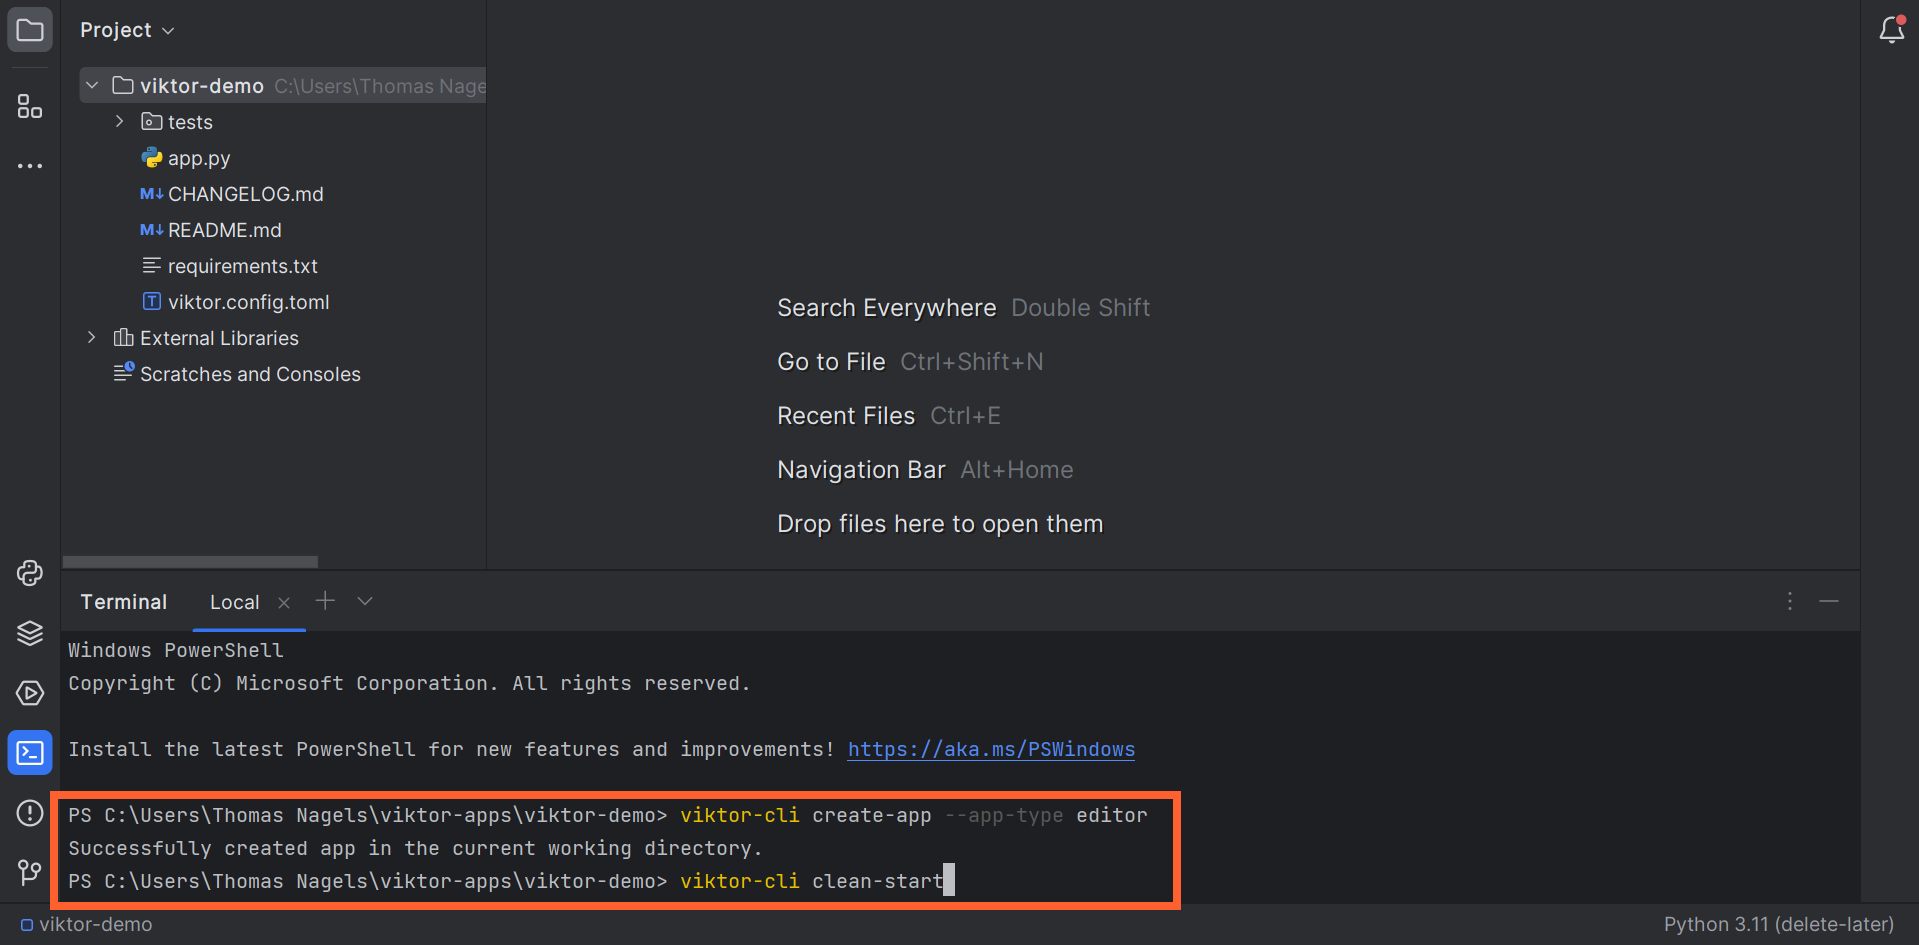
Running this command can take a few minutes. When the installation is complete you will see the following lines printed in the terminal. This means that the app is connected to the VIKTOR platform.
INFO    :  __      __ __  __  __
INFO    :  \ \    / / | | | |/ /
INFO    :   \ \  / /  | | | ' /
INFO    :    \ \/ /   | | |  <
INFO    :     \  /    | | | . \
INFO    :      \/     |_| |_|\_\
INFO    :   _______   ____    _____
INFO    :  |__   __| / __ \  |  __ \
INFO    :     | |   | |  | | | |__) |
INFO    :     | |   | |  | | |  _  /
INFO    :     | |   | |__| | | | \ \
INFO    :     |_|    \____/  |_|  \_\
INFO    : VIKTOR connector vX.Y.Z
INFO    : VIKTOR SDK vX.Y.Z
INFO    : Connecting to platform...
INFO    : Connection is established: <URL>  <---- here you can see your app
INFO    : The connection can be closed using Ctrl+C
INFO    : App is ready
Do not close the terminal as this will break the connection with your app.
App.py structure explained
- The app will update automatically after adding your code and saving the
app.pyfile, as long as you don't close the terminal. - Did you close your code editor or the terminal inside your editor? Use
viktor-cli startto start the app again. No need to run the install and clear commands. - Once your app is started you will be able to interact with it in your Development workspace
Open the app.py file in your code editor. This is where you will write the code of your app.
The content should look like this:
from viktor import ViktorController
from viktor.parametrization import ViktorParametrization


class Parametrization(ViktorParametrization):
    pass


class Controller(ViktorController):
    label = 'My Entity Type'
    parametrization = Parametrization
The app.py file consists of 3 parts:
- Imports: this is where you import Python modules you use in your app.
- Parametrization: this is where you define the inputs of your app.
- Controller: this is where you define the outputs (such as visualizations) and logic of your app.
Add additional imports
To complete this task you will need some additional imports. Copy and paste the imports
underneath the ones that are already present in the app.py file.
from viktor.parametrization import ViktorParametrization, Text, GeoPointField, GeoPolygonField
from viktor.views import MapPolygon, MapResult, MapPoint, MapView, Color
The resulting app.py will look like this. You can use the snippet below to check your code.
from viktor import ViktorController
from viktor.parametrization import ViktorParametrization
from viktor.parametrization import Text, GeoPointField, GeoPolygonField
from viktor.views import MapPolygon, MapResult, MapPoint, MapView, Color


class Parametrization(ViktorParametrization):
    pass


class Controller(ViktorController):
    label = 'My Entity Type'
    parametrization = Parametrization
Add a map to your app
The first thing you will need to do to complete this task is to add a map to your app.
To do this add the highlighted lines of code in the Controller class.
class Controller(ViktorController):
    label = 'My Entity Type'
    parametrization = Parametrization

    @MapView("Map", duration_guess=1)
    def starter_guide_map(self, params, **kwargs):
        features = []
        return MapResult(features)
The resulting app.py will look like this. You can use the snippet below to check your code.
from viktor import ViktorController
from viktor.parametrization import ViktorParametrization
from viktor.parametrization import Text, GeoPointField, GeoPolygonField
from viktor.views import MapPolygon, MapResult, MapPoint, MapView, Color


class Parametrization(ViktorParametrization):
    pass


class Controller(ViktorController):
    label = 'My Entity Type'
    parametrization = Parametrization

    @MapView("Map", duration_guess=1)
    def starter_guide_map(self, params, **kwargs):
        features = []
        return MapResult(features)
Save the app.py file. This action triggers a reload of your app. This reload is shown in the terminal.
If you made a mistake any errors will also be printed in the terminal.
INFO    : Reloading app...
INFO    : App is ready
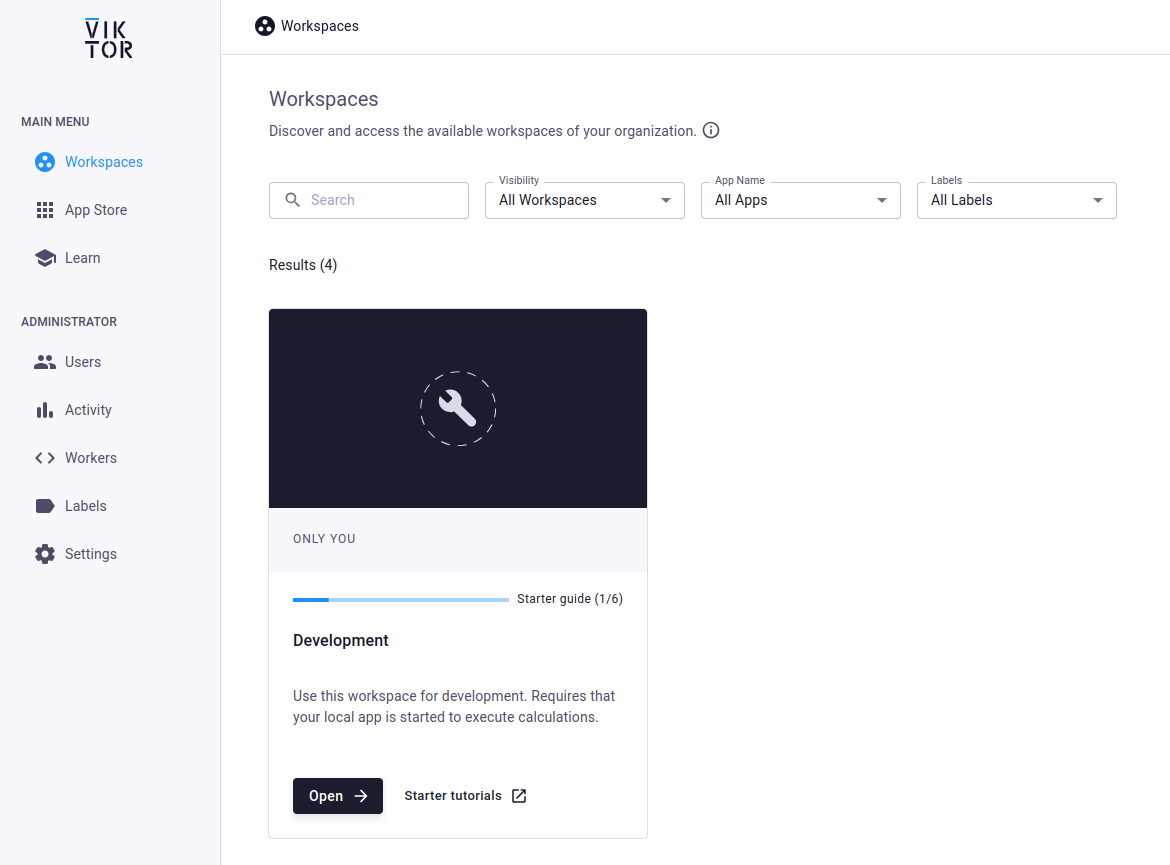
At this point you must be wondering what the app looks like. The Development workspace is where you can see and use the resulting app. Switch to VIKTOR in your browser. If you continued with this starter guide immediately after activating your account you have been automatically redirected into your Development workspace. In that case simply refresh the browser to see your app. If this is not the case you can open the Development workspace by clicking the open button as you can see in the image below:
After you enter the development workspace and refresh the page you will notice that with just 4 lines of code you have added a map to your app!

Add some places of interest
Before we make the app interactive, let's add some features to make it more interesting. You may copy list of features from the snippet below. You only need to add or change the highlighted lines of code.
class Controller(ViktorController):
    label = 'My Entity Type'
    parametrization = Parametrization

    @MapView("Map", duration_guess=1)
    def starter_guide_map(self, params, **kwargs):
        features = [
            MapPoint( 52.5200, 13.4050, title='Berlin, Germany'),
            MapPoint(47.6062, -122.3321, title='Seattle, USA'),
            MapPoint(53.3498, -6.2603, title='Dublin, Ireland'),
            MapPoint(43.6511, -79.3470, title='Toronto, Canada'),
            MapPoint(41.3851, 2.1734, title='Barcelona, Spain'),
            MapPoint(-34.6037, -58.3816, title='Buenos Aires, Argentina'),
            MapPoint(-33.9249, 18.4241, title='Cape Town, South Africa')
        ]
        return MapResult(features)
The resulting app.py will look like this. You can use the snippet below to check your code.
from viktor import ViktorController
from viktor.parametrization import ViktorParametrization
from viktor.parametrization import Text, GeoPointField, GeoPolygonField
from viktor.views import MapPolygon, MapResult, MapPoint, MapView, Color


class Parametrization(ViktorParametrization):
    pass


class Controller(ViktorController):
    label = 'My Entity Type'
    parametrization = Parametrization

    @MapView("Map", duration_guess=1)
    def starter_guide_map(self, params, **kwargs):
        features = [
            MapPoint( 52.5200, 13.4050, title='Berlin, Germany'),
            MapPoint(47.6062, -122.3321, title='Seattle, USA'),
            MapPoint(53.3498, -6.2603, title='Dublin, Ireland'),
            MapPoint(43.6511, -79.3470, title='Toronto, Canada'),
            MapPoint(41.3851, 2.1734, title='Barcelona, Spain'),
            MapPoint(-34.6037, -58.3816, title='Buenos Aires, Argentina'),
            MapPoint(-33.9249, 18.4241, title='Cape Town, South Africa')
        ]
        return MapResult(features)
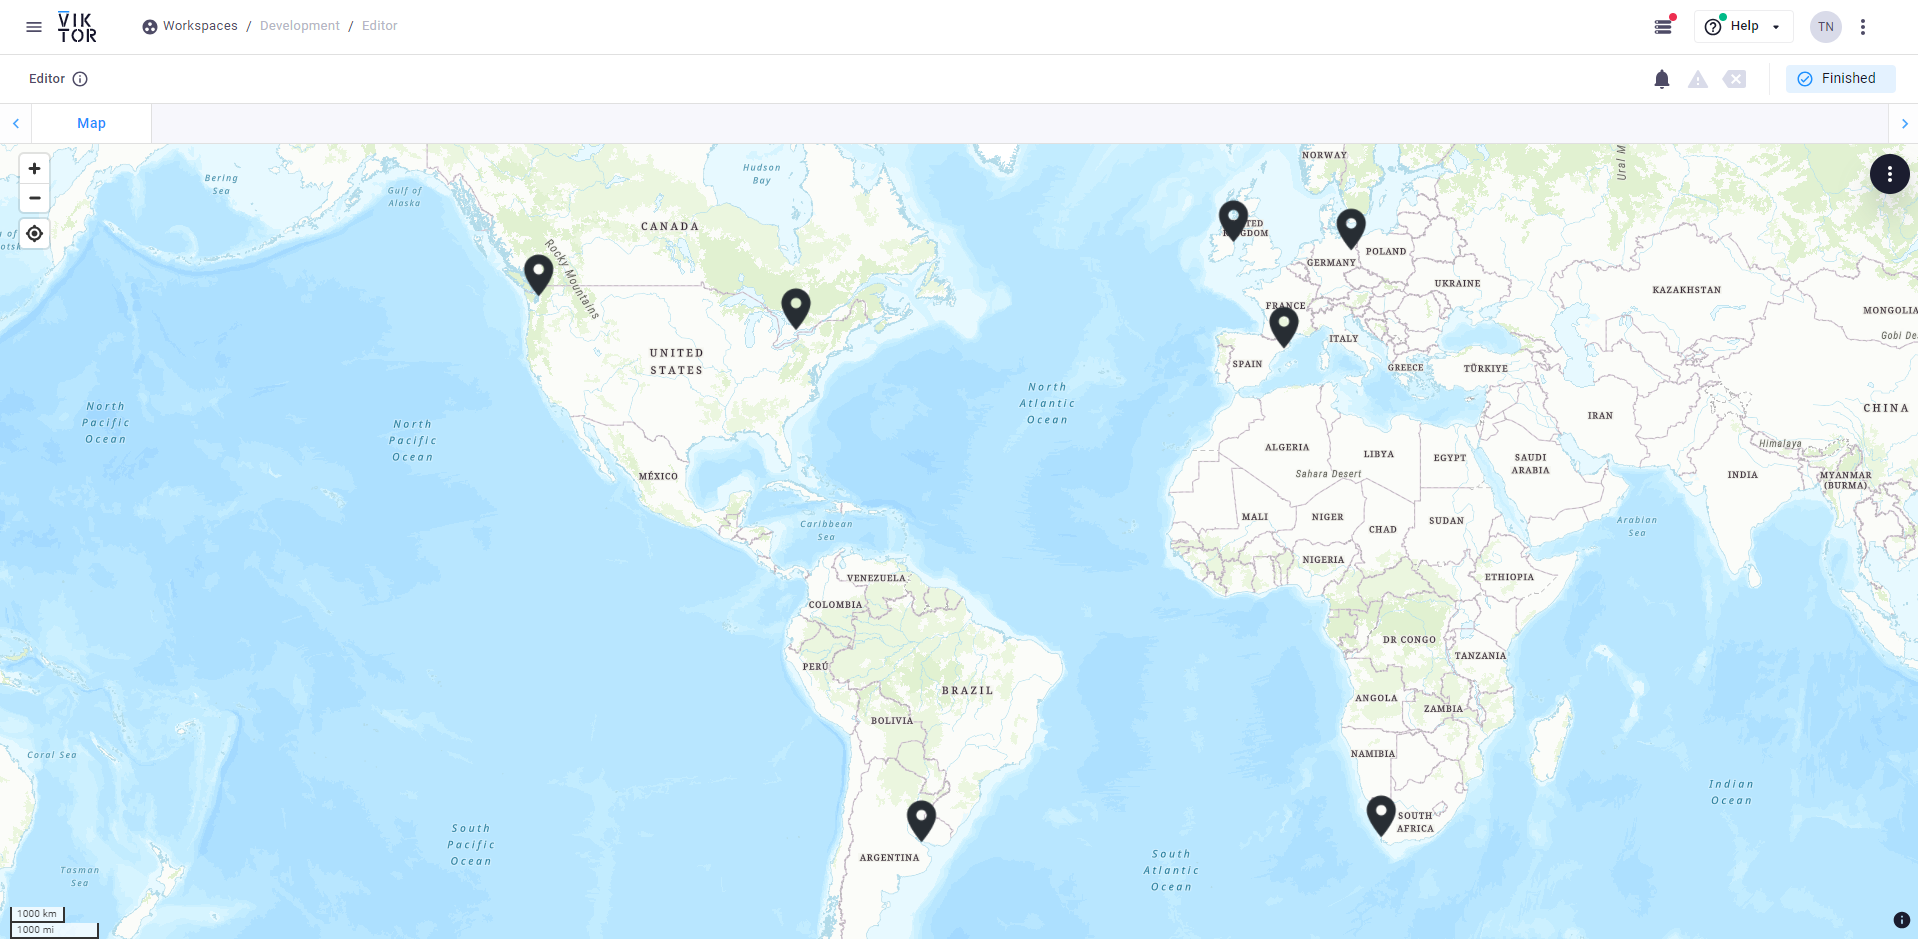
If you refresh your Development workspace in the browser you will see that markers have been added for each city in the list. You can click on a marker to inspect the name of the city.
Let's make it interactive!
You can make an app interactive by adding input fields to the Parametrization class. No need to make a new class,
simply add the fields and titles underneath the class you already have.
We will add a title to our parameters using the Text class and two additional fields to add a polygon and point to the map.
You only need to replace the pass statement with the highlighted lines of code.
class Parametrization(ViktorParametrization):
    text_map = Text('## Map inputs')
    map_polygon = GeoPolygonField('Draw a polygon on the map')
    map_point = GeoPointField('Add a point to the map')
The resulting app.py will look like this. You can use the snippet below to check your code.
from viktor import ViktorController
from viktor.parametrization import ViktorParametrization
from viktor.parametrization import Text, GeoPointField, GeoPolygonField
from viktor.views import MapPolygon, MapResult, MapPoint, MapView, Color


class Parametrization(ViktorParametrization):
    text_map = Text('## Map inputs')
    map_polygon = GeoPolygonField('Draw a polygon on the map')
    map_point = GeoPointField('Add a point to the map')


class Controller(ViktorController):
    label = 'My Entity Type'
    parametrization = Parametrization

    @MapView("Map", duration_guess=1)
    def starter_guide_map(self, params, **kwargs):
        features = [
            MapPoint( 52.5200, 13.4050, title='Berlin, Germany'),
            MapPoint(47.6062, -122.3321, title='Seattle, USA'),
            MapPoint(53.3498, -6.2603, title='Dublin, Ireland'),
            MapPoint(43.6511, -79.3470, title='Toronto, Canada'),
            MapPoint(41.3851, 2.1734, title='Barcelona, Spain'),
            MapPoint(-34.6037, -58.3816, title='Buenos Aires, Argentina'),
            MapPoint(-33.9249, 18.4241, title='Cape Town, South Africa')
        ]
        return MapResult(features)
Save the app.py file and refresh your browser. You should see the input field appear:

If we want our changes to become visible on the map, we need to add them to the features just like we added the list with cities.
The inputs you defined on the Parametrization are passed to the MapView method
with the params argument. For example, to use the value of the GeoPointField you can reference
it by its variable name params.map_point. Since the map_polygon and map_point need to be selected by a user first,
we will use an if-statement to check if something has been selected and use that to make the polygon/point on the map!
Let's also change the color of the point we select to blue so that we can distinguish it from all the other points we added earlier!
You only need to add or change the highlighted lines of code.
class Controller(ViktorController):
    label = 'My Entity Type'
    parametrization = Parametrization

    @MapView("Map", duration_guess=1)
    def starter_guide_map(self, params, **kwargs):
        features = [
            MapPoint( 52.5200, 13.4050, title='Berlin, Germany'),
            MapPoint(47.6062, -122.3321, title='Seattle, USA'),
            MapPoint(53.3498, -6.2603, title='Dublin, Ireland'),
            MapPoint(43.6511, -79.3470, title='Toronto, Canada'),
            MapPoint(41.3851, 2.1734, title='Barcelona, Spain'),
            MapPoint(-34.6037, -58.3816, title='Buenos Aires, Argentina'),
            MapPoint(-33.9249, 18.4241, title='Cape Town, South Africa')
        ]
        if params.map_point:
            features.append(MapPoint.from_geo_point(params.map_point, color=Color.blue()))
        if params.map_polygon:
            features.append(MapPolygon.from_geo_polygon(params.map_polygon))
        return MapResult(features)
The resulting app.py will look like this. You can use the snippet below to check your code.
from viktor import ViktorController
from viktor.parametrization import ViktorParametrization
from viktor.parametrization import Text, GeoPointField, GeoPolygonField
from viktor.views import MapPolygon, MapResult, MapPoint, MapView, Color


class Parametrization(ViktorParametrization):
    text_map = Text('## Map inputs')
    map_polygon = GeoPolygonField('Draw a polygon on the map')
    map_point = GeoPointField('Add a point to the map')


class Controller(ViktorController):
    label = 'My Entity Type'
    parametrization = Parametrization

    @MapView("Map", duration_guess=1)
    def starter_guide_map(self, params, **kwargs):
        features = [
            MapPoint( 52.5200, 13.4050, title='Berlin, Germany'),
            MapPoint(47.6062, -122.3321, title='Seattle, USA'),
            MapPoint(53.3498, -6.2603, title='Dublin, Ireland'),
            MapPoint(43.6511, -79.3470, title='Toronto, Canada'),
            MapPoint(41.3851, 2.1734, title='Barcelona, Spain'),
            MapPoint(-34.6037, -58.3816, title='Buenos Aires, Argentina'),
            MapPoint(-33.9249, 18.4241, title='Cape Town, South Africa')
        ]
        if params.map_point:
            features.append(MapPoint.from_geo_point(params.map_point, color=Color.blue()))
        if params.map_polygon:
            features.append(MapPolygon.from_geo_polygon(params.map_polygon))
        return MapResult(features)
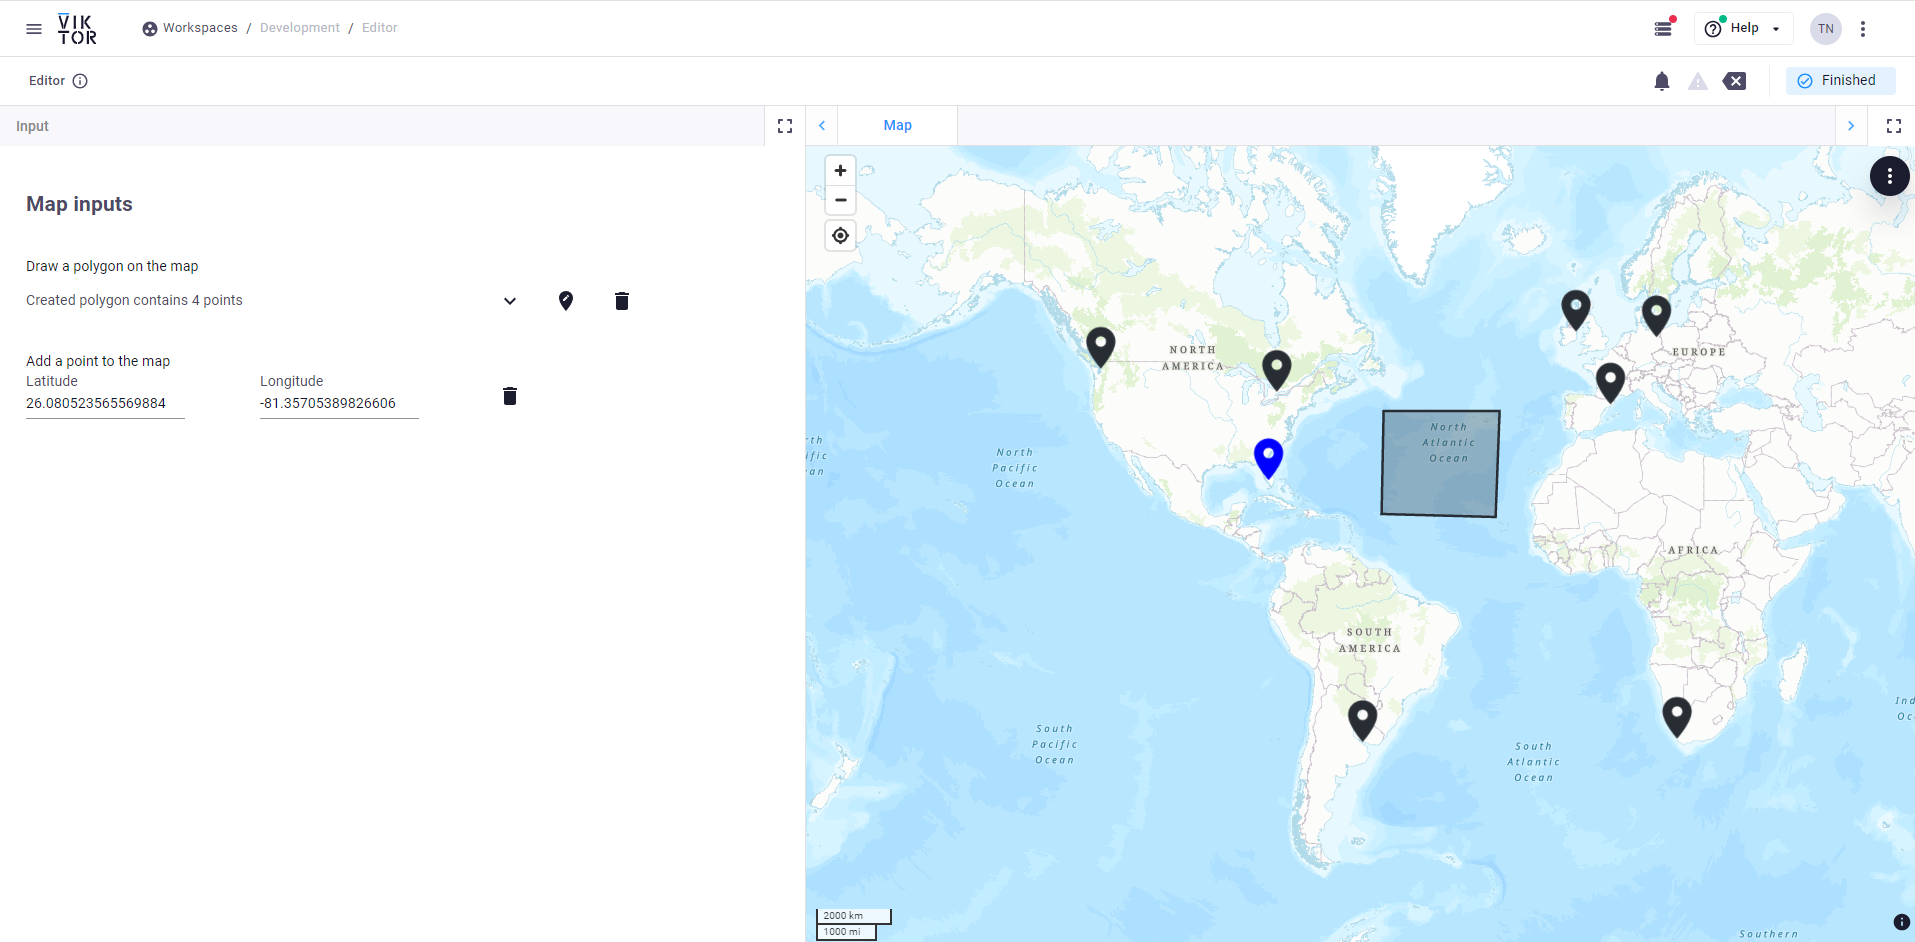
Save app.py again. You can now select the pencil icon to create a polygon on the map. Next you can add a blue marker
to the map by clicking the location icon and placing it on the map. The result will look similar to the image below.
You now know how to add basic maps to your VIKTOR app. If you want to start learning more about what you can do with maps, feel free to try out the full tutorial. Continue the next section or come back tomorrow to spread the workload!