Single Sign On (SSO)
The VIKTOR platform supports Single Sign On using the OpenID Connect protocol. In this guide the configuration on Microsoft Entra ID is laid out. This guide will walk you through all the required steps to configure your VIKTOR application, so that it uses OpenID Connect to authenticate to your Microsoft Entra ID, forcing your users to access it using their Entra ID account.
Once you have completed this configuration you can enable an OpenID Connect "Log in with Microsoft Entra ID" button for your VIKTOR application.
Upon request, we can customize the provider name "Microsoft Entra ID" in your login button label, with the label of your choosing.
Additionally, to this guide you can see Microsoft Entra ID - Register An App Quickstart Guide as a reference.
If Single Sign On is enabled, users will sign in using your Microsoft Entra ID, but there is no active synchronization between the Microsoft Entra ID and the VIKTOR environment. When you remove a user from your Microsoft Entra ID, this user will be blocked when trying to sign in through SSO, but the user will still be present in the users-list in the VIKTOR environment.
Users with a developer account have a second method of authentication, which is used when commands are executed from the CLI (such as listing apps or publishing apps). The developer token expires 1 month after the last login, meaning that in case you revoke access (in Entra ID) for a developer user, he/she will automatically lose developer access after this month. Alternatively, you can revoke developer access immediately by manually deleting the developer user in the VIKTOR environment.
Create a new Microsoft Entra ID Application
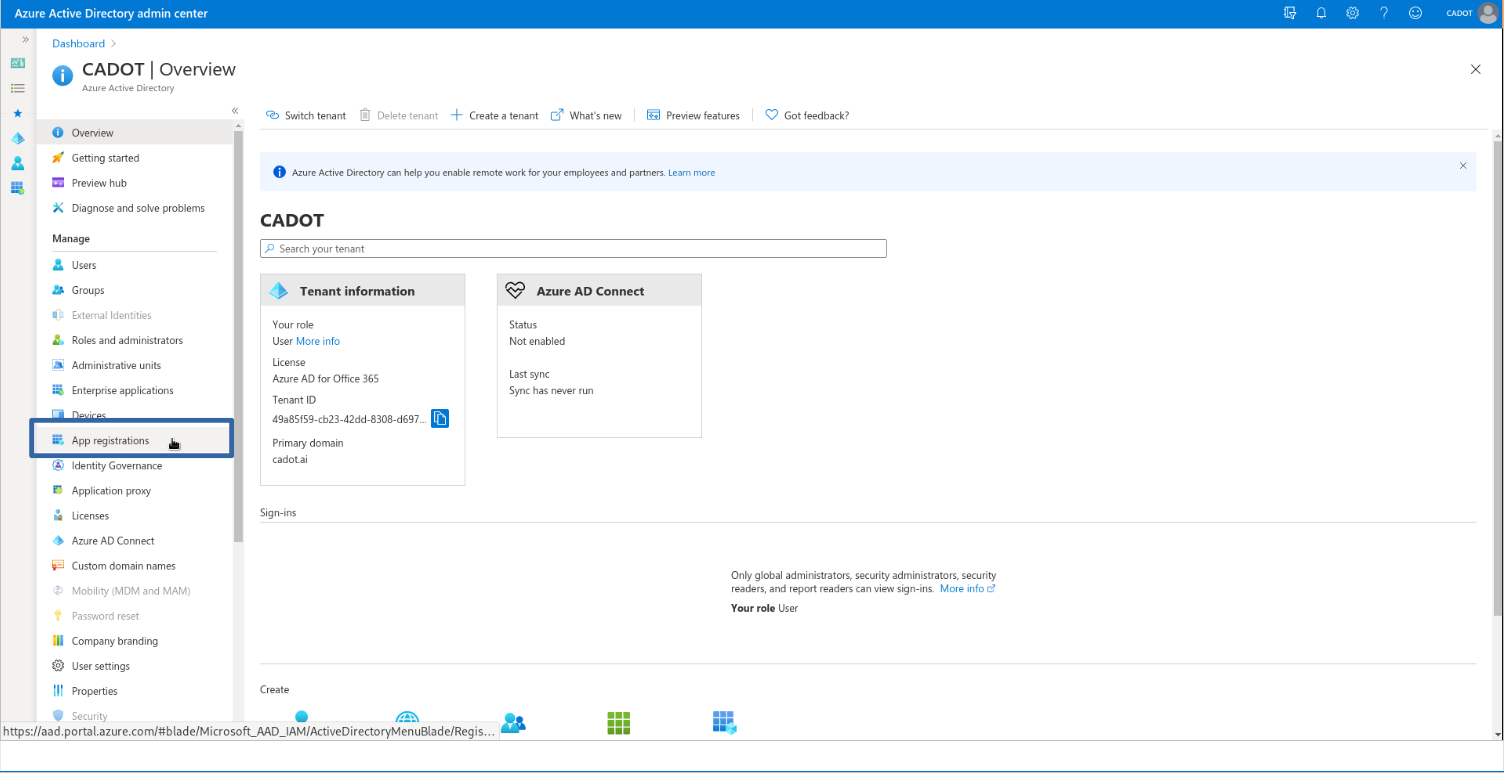
First, you need to open your Microsoft Entra ID portal, either by logging in to your Microsoft Entra admin center
and then selecting the Microsoft Entra ID service, or by directly visiting
entra.microsoft.com. To create a new application, go to
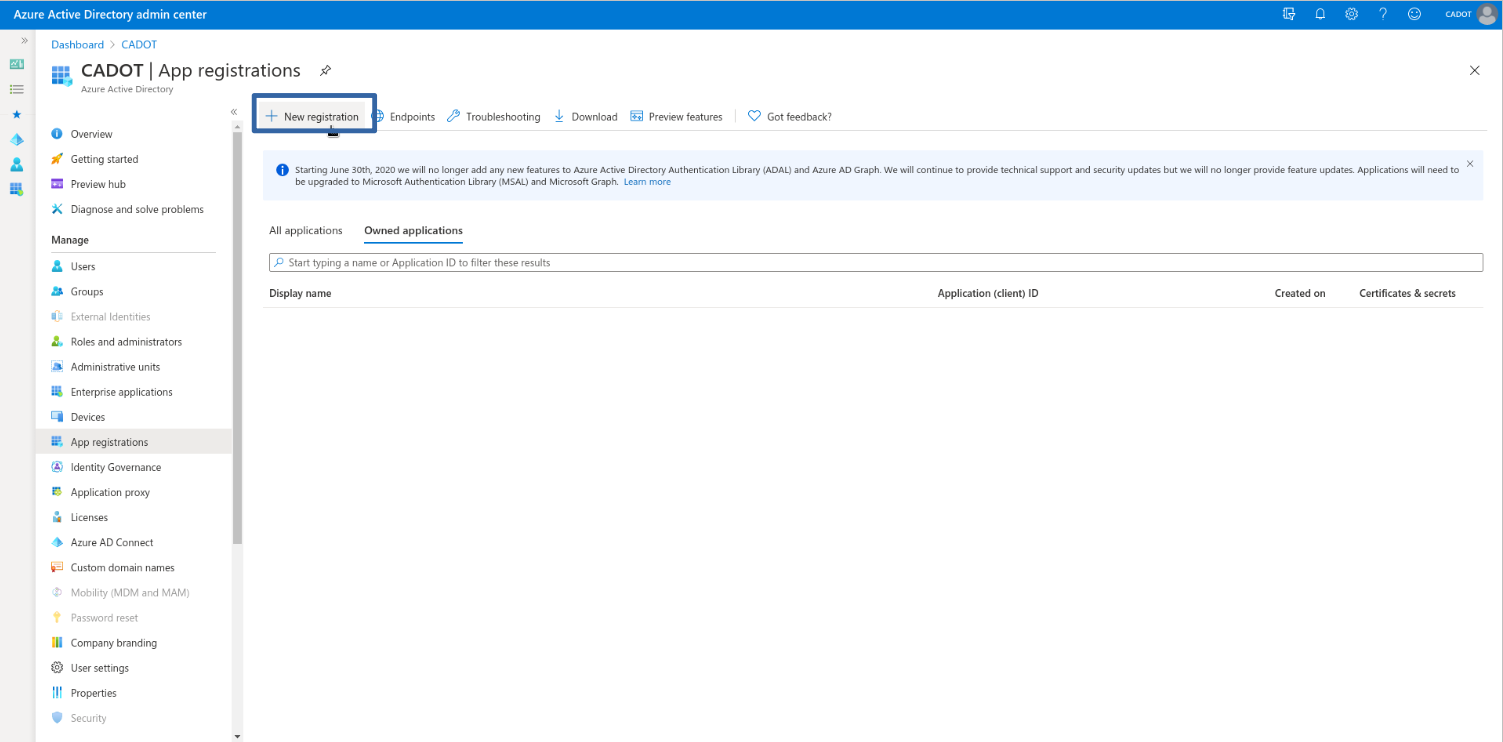
App Registrations > New Registration, as shown in the screenshots below.
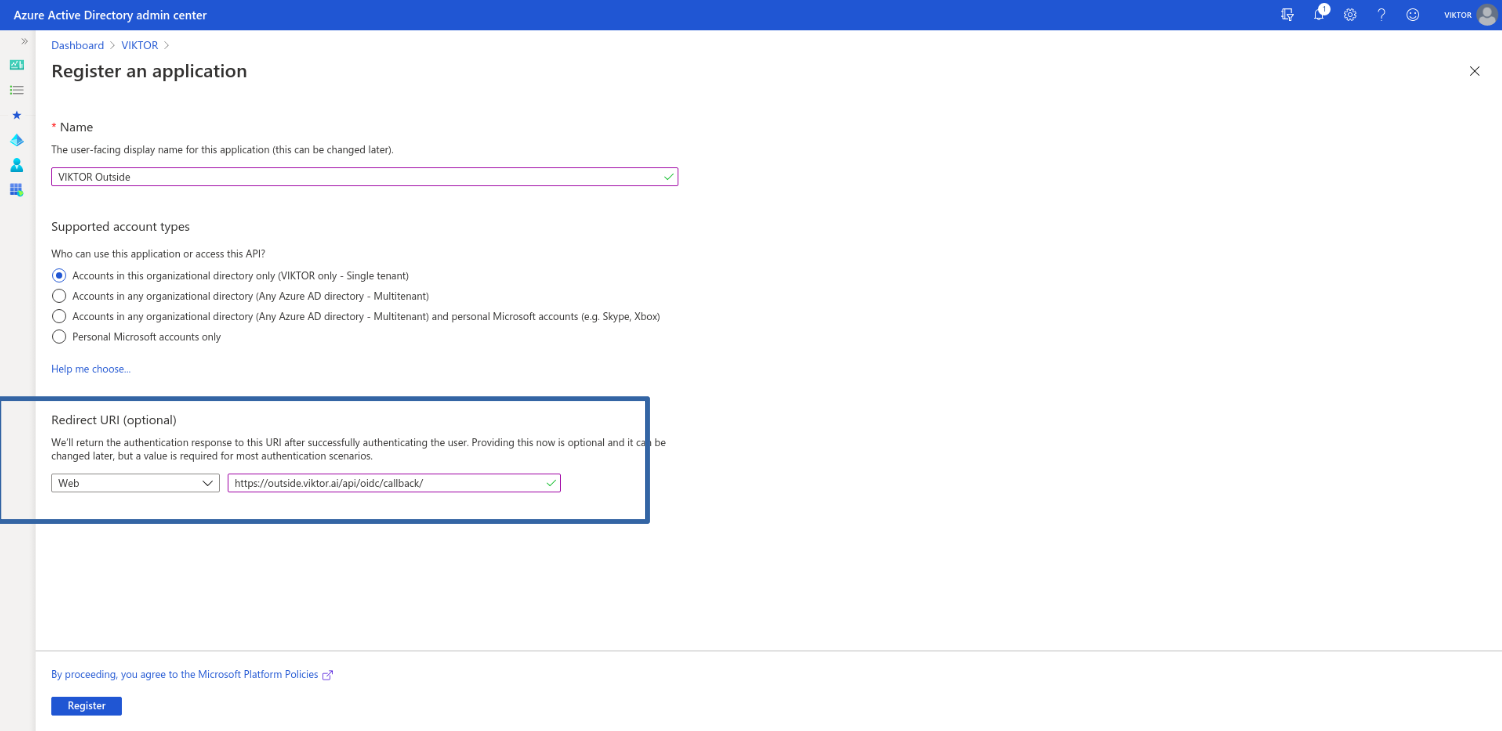
Here we have configured our application’s Redirect URI. If your VIKTOR application is running at
https://{subdomain}.viktor.ai, this value should be https://{subdomain}.viktor.ai/api/oidc/callback/.
To avoid naming inconsistencies and to make it easier for your admins and users to discover the application, you can standardize the name of your VIKTOR applications as "VIKTOR {subdomain}".
Set up the Microsoft Entra ID Application
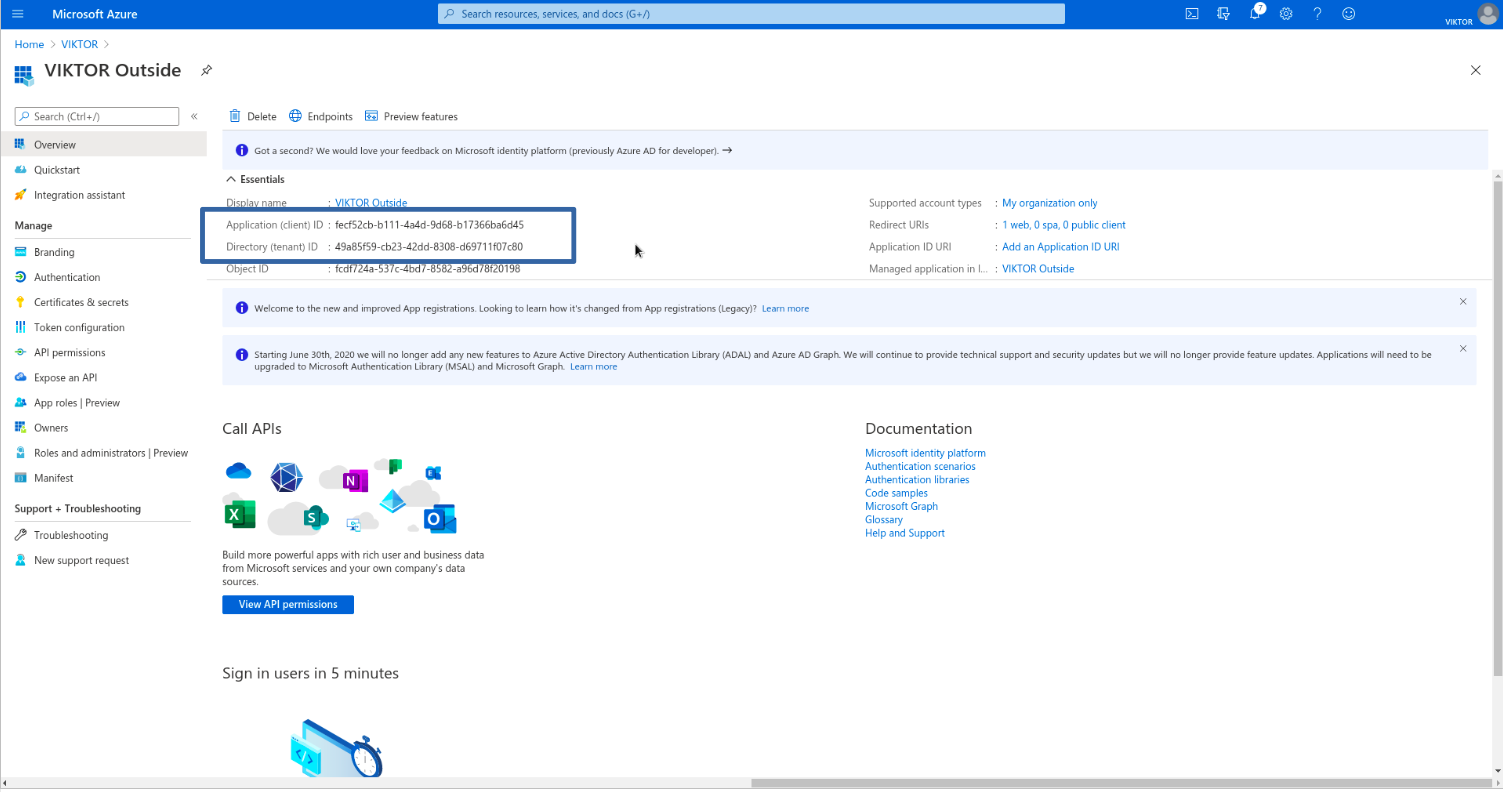
- Application IDs
After you have created the new application, you can find its IDs in the "Overview" page, as shown below. The Application (client) ID and Directory (tenant) ID will be used later to setup your VIKTOR application.
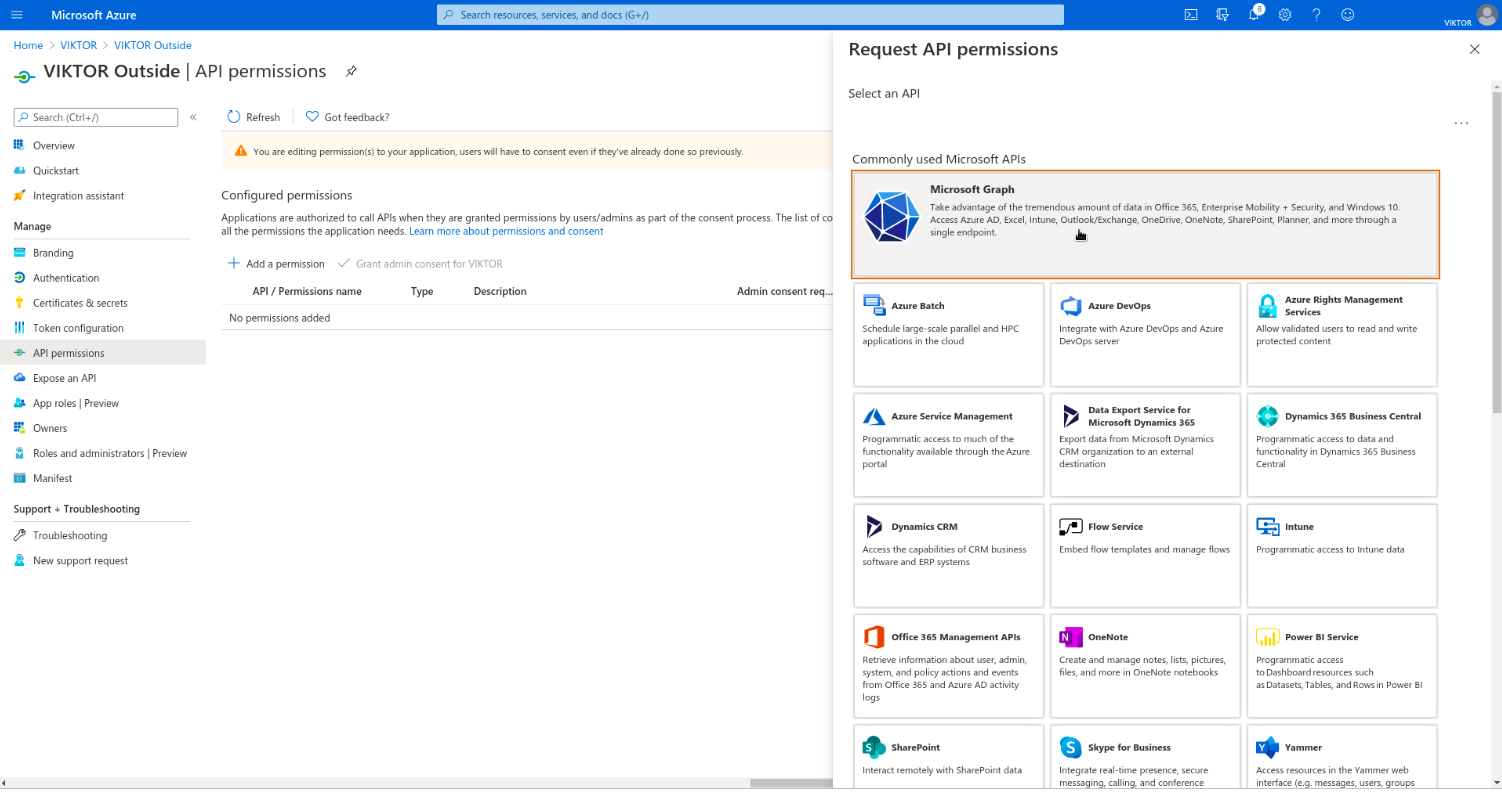
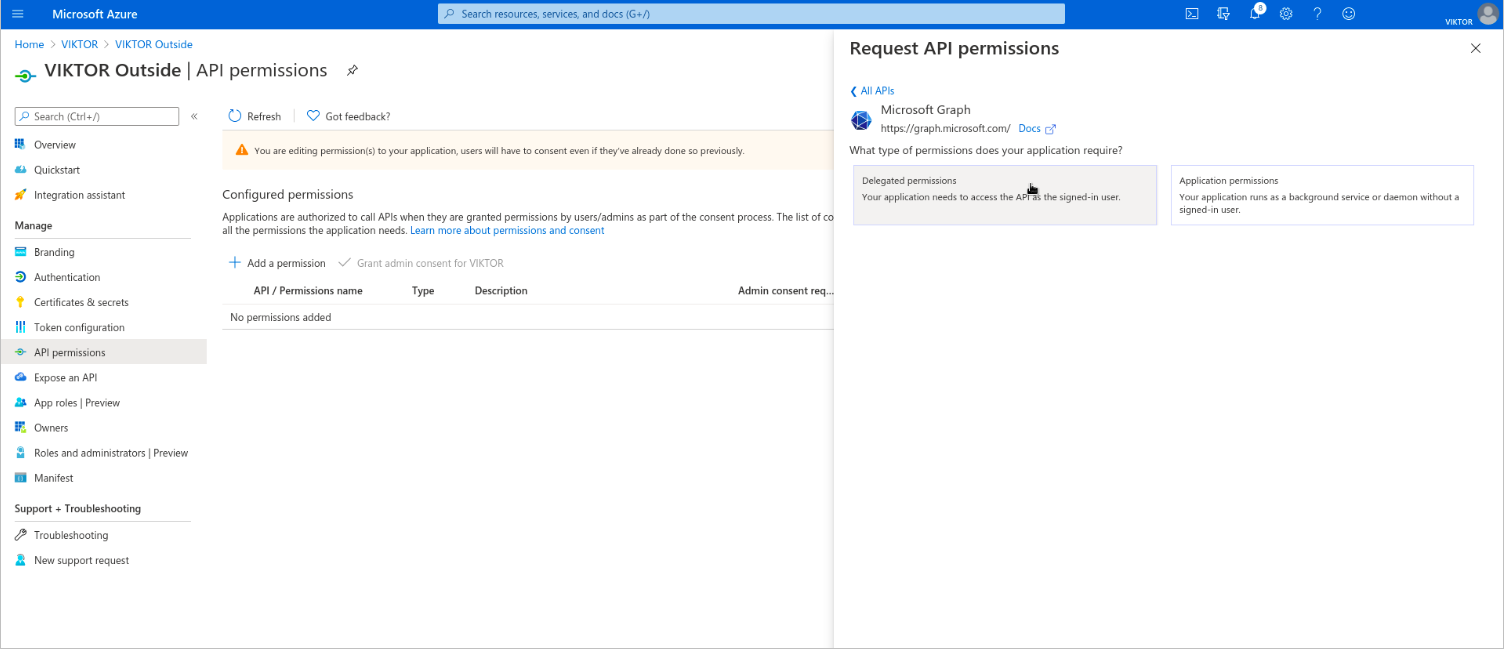
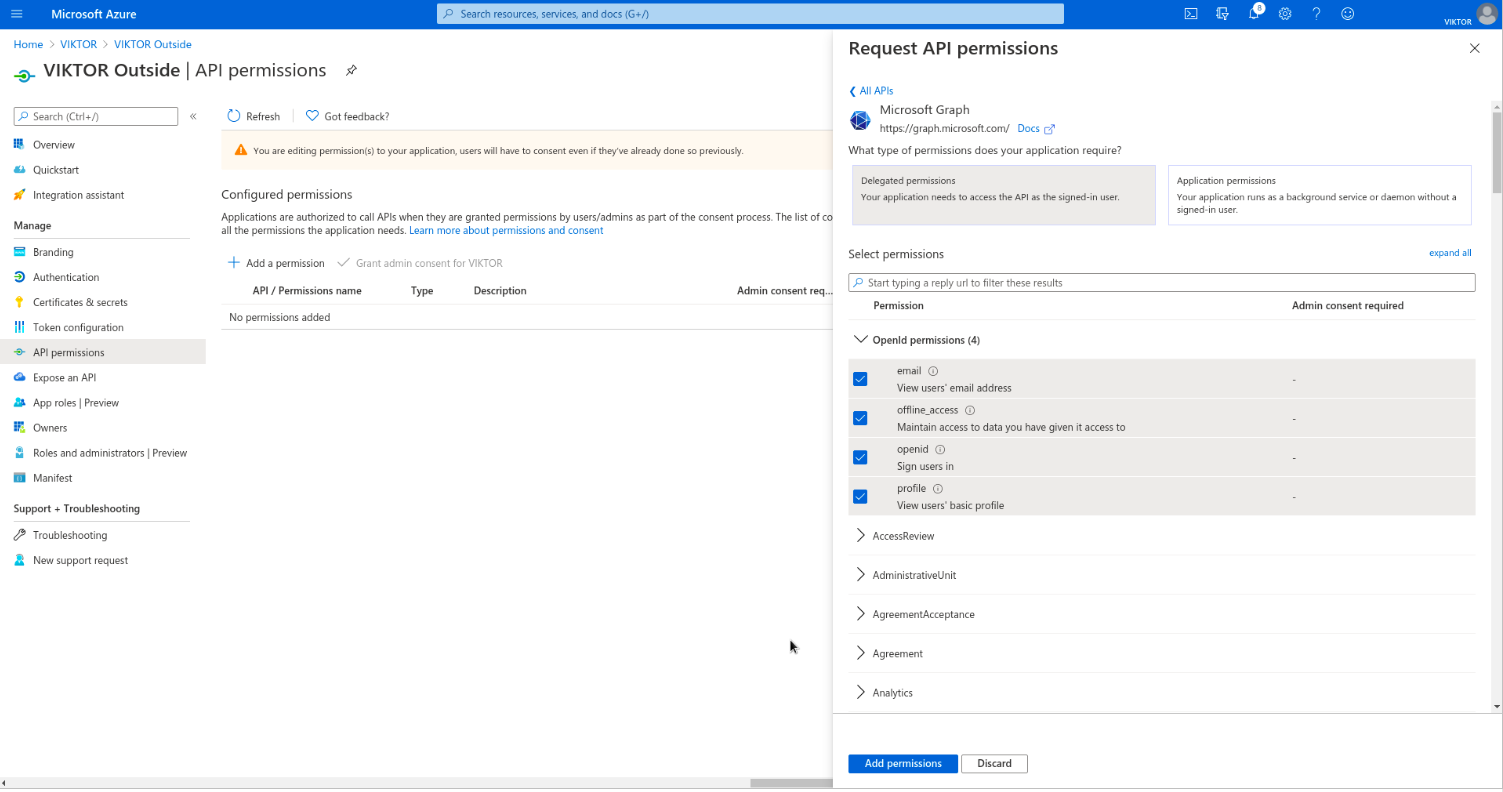
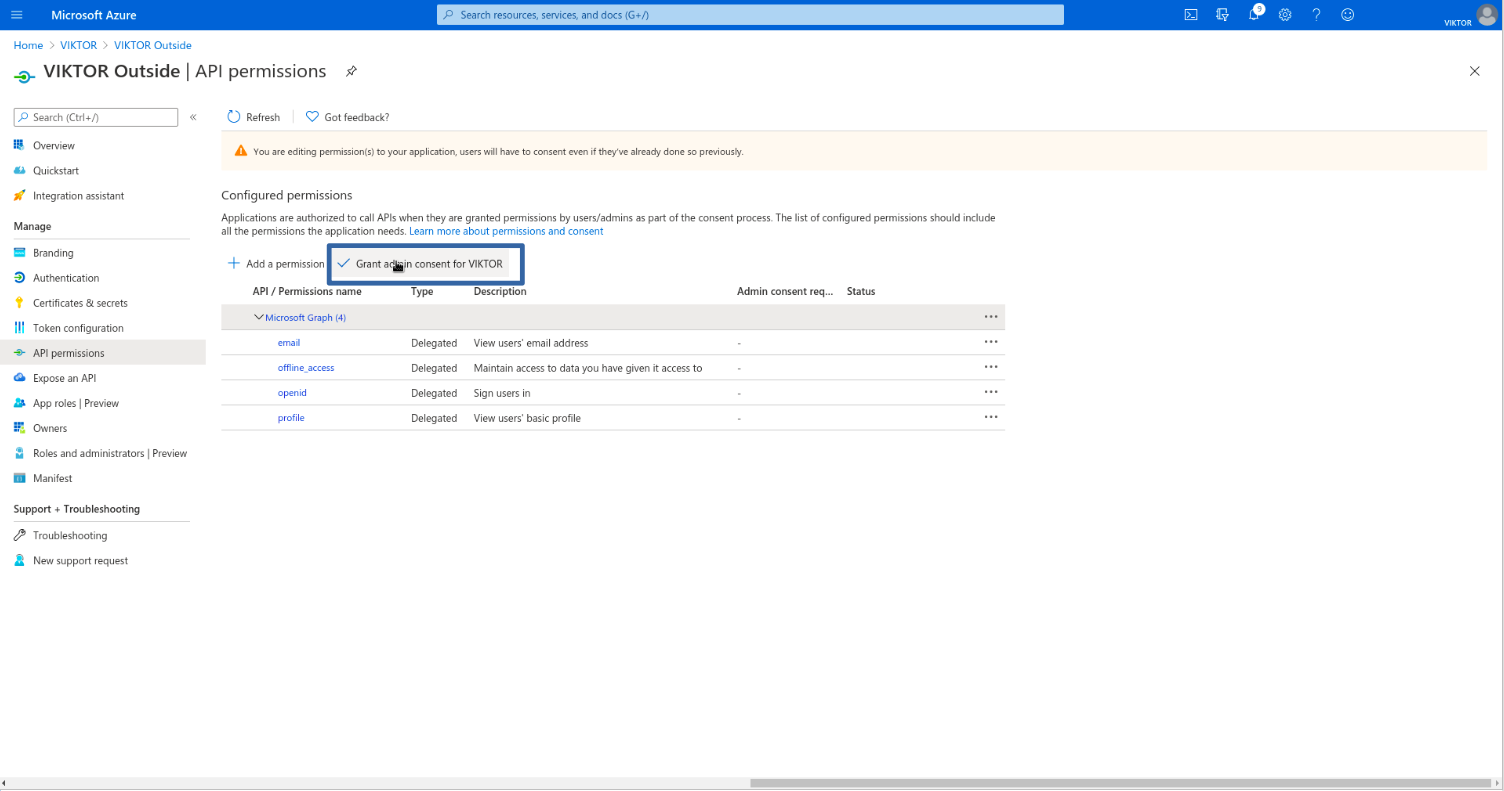
- Configure permissions
Next, you need to enable the required permissions for VIKTOR to be able to read the logged-in user’s basic information and register them to your VIKTOR application, after they have successfully logged in. Go to "API Permissions" and clear existing permissions. Add the required permissions by navigating to: Add a permission > Microsoft Graph > Delegated permissions. Select email, offline_access, openid and profile, and click "Add permissions". Click "Grant admin consent for {tenant}".
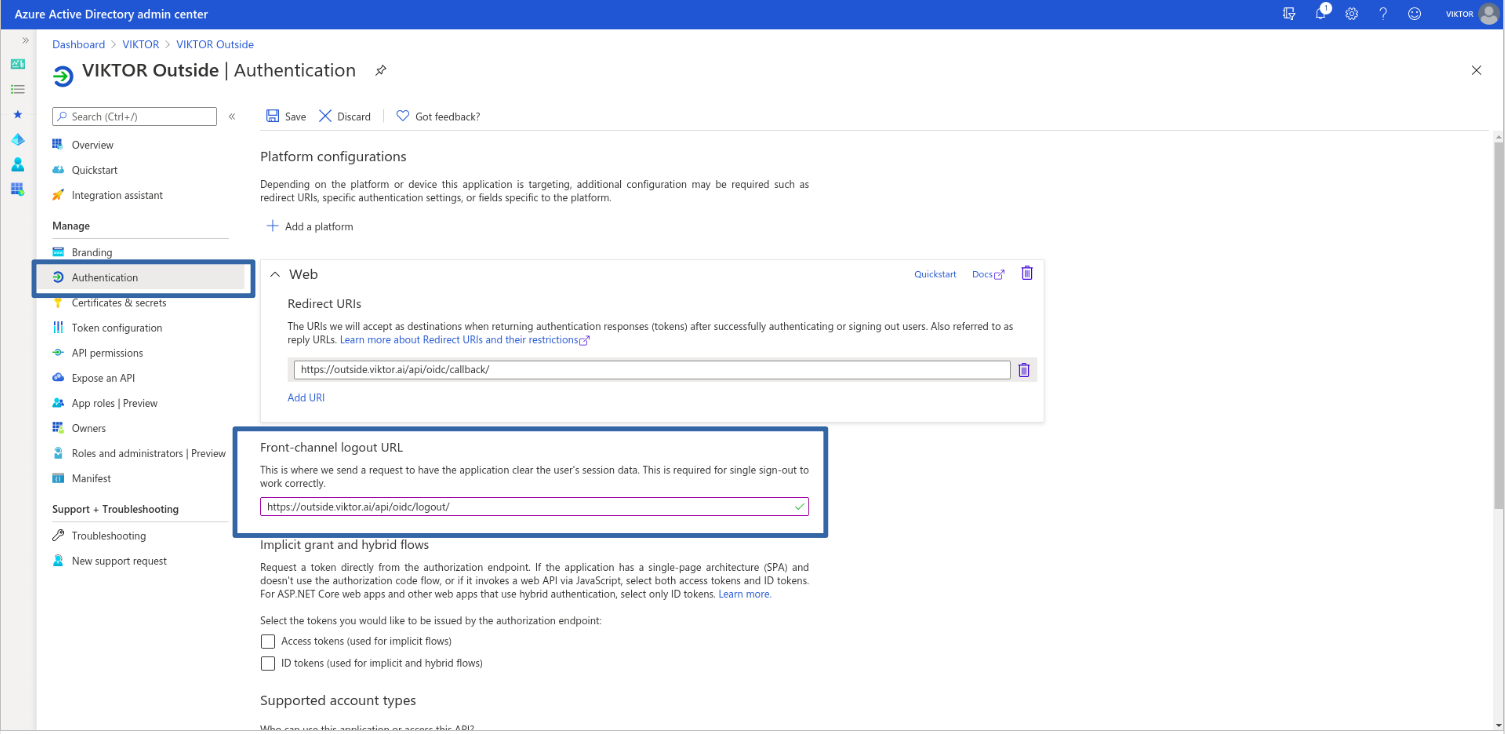
- Setup for Single Logout
To enable your VIKTOR application to log out a user when they log out from Microsoft Entra ID, you need to specify your
application’s Logout URL, in the "Authentication" page. If your VIKTOR application is running at
https://{subdomain}.viktor.ai, this value should be https://{subdomain}.viktor.ai/api/oidc/logout/.
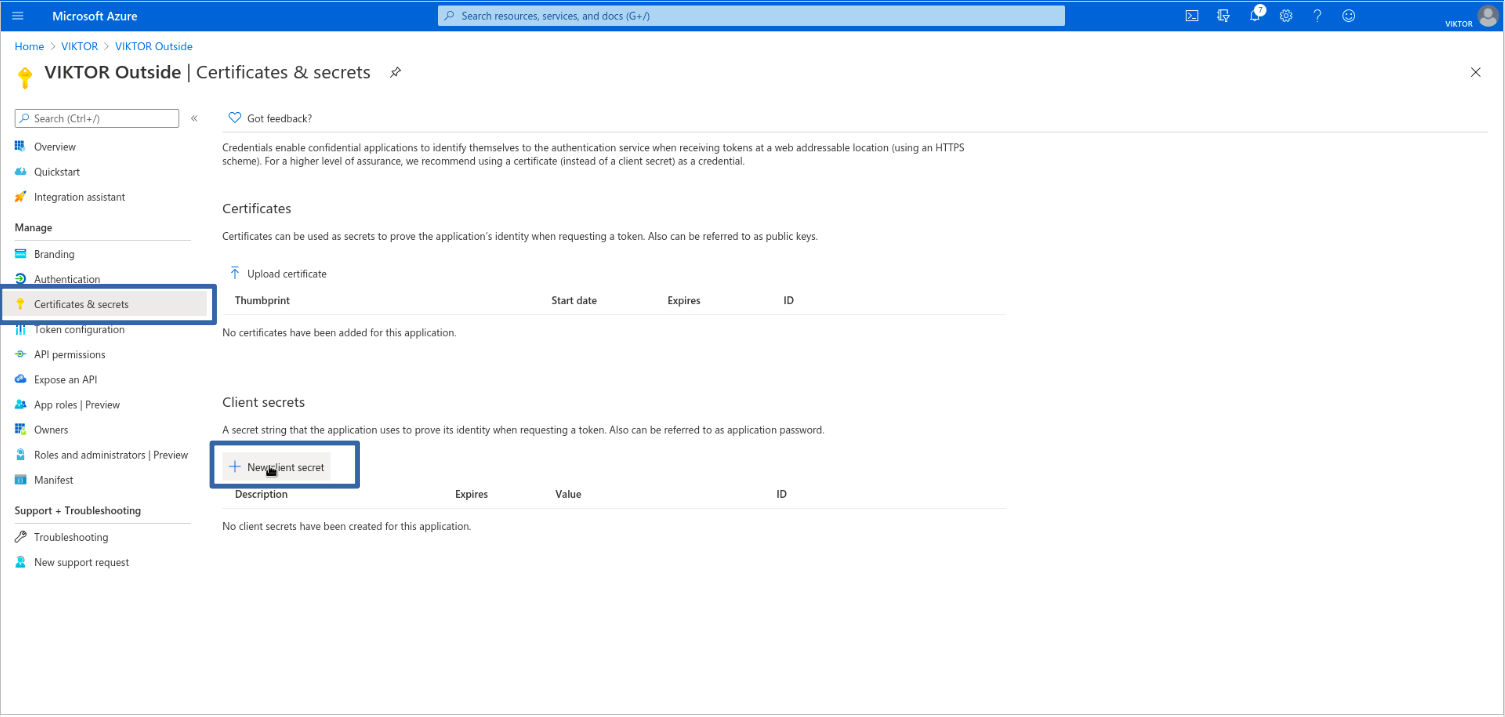
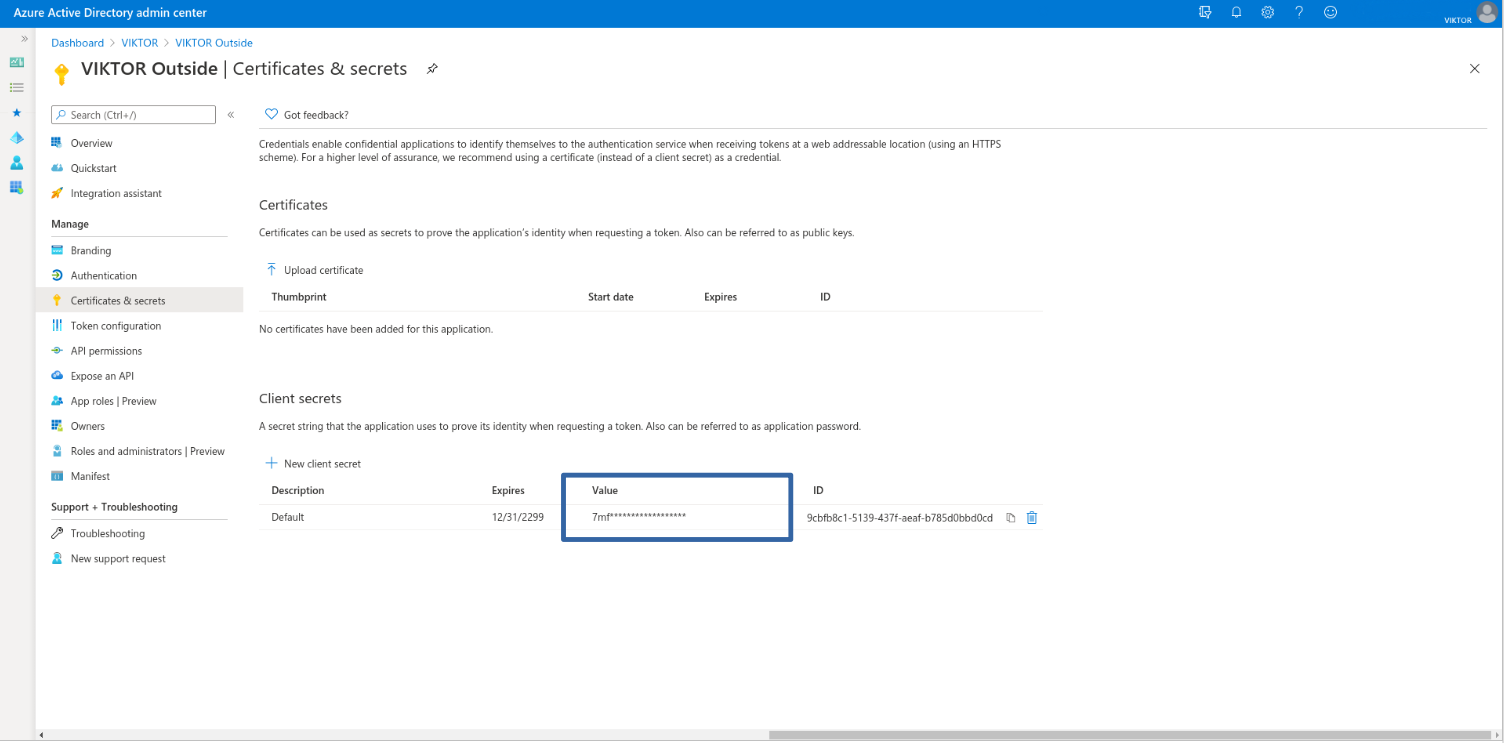
- Create a client secret
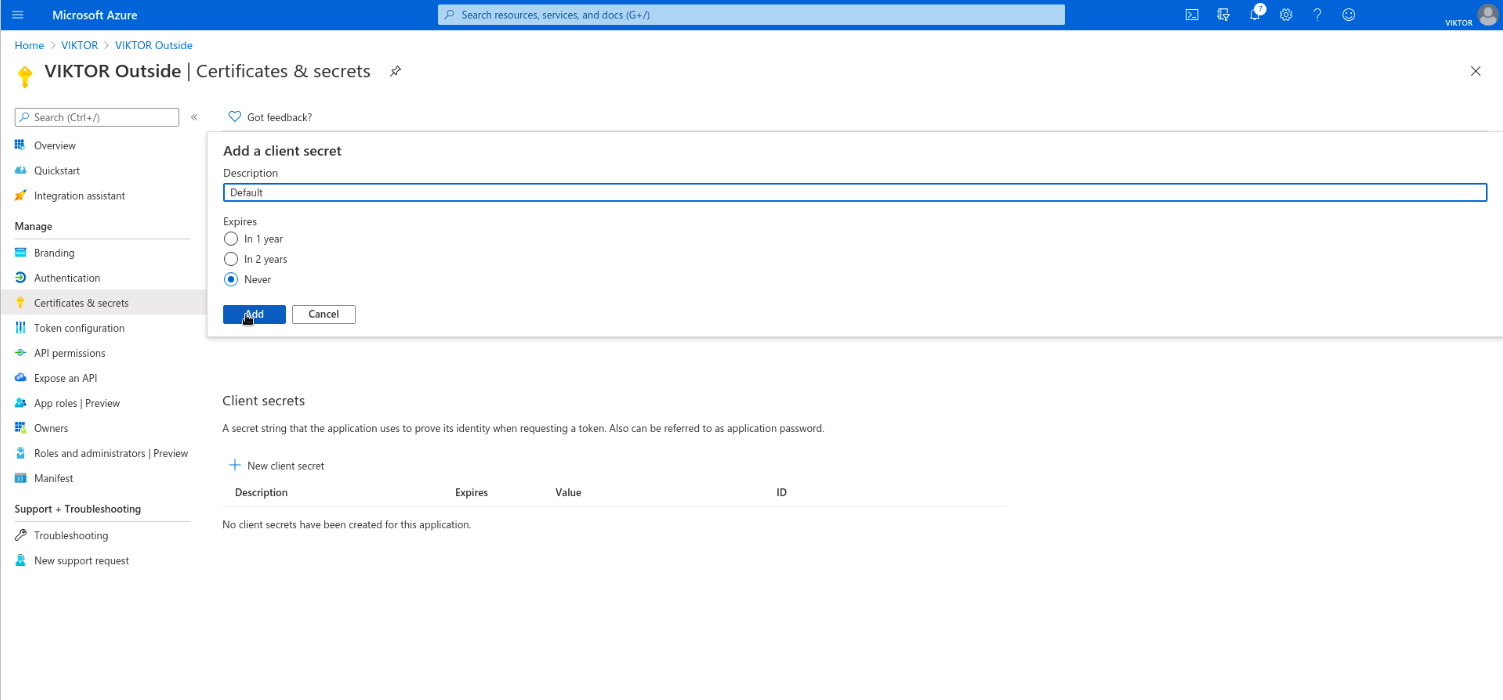
Last, you need to create a client secret for your VIKTOR application to prove its identity when authenticating the user. Go to "Certificates & secrets" and add a client secret. Use description "Default" and expiration "Never". Copy the value of the secret for later use.
If you have other requirements concerning the expiration of this secret you are free to choose so. Please remember that when changing this secret you will have to relay the new value with us.
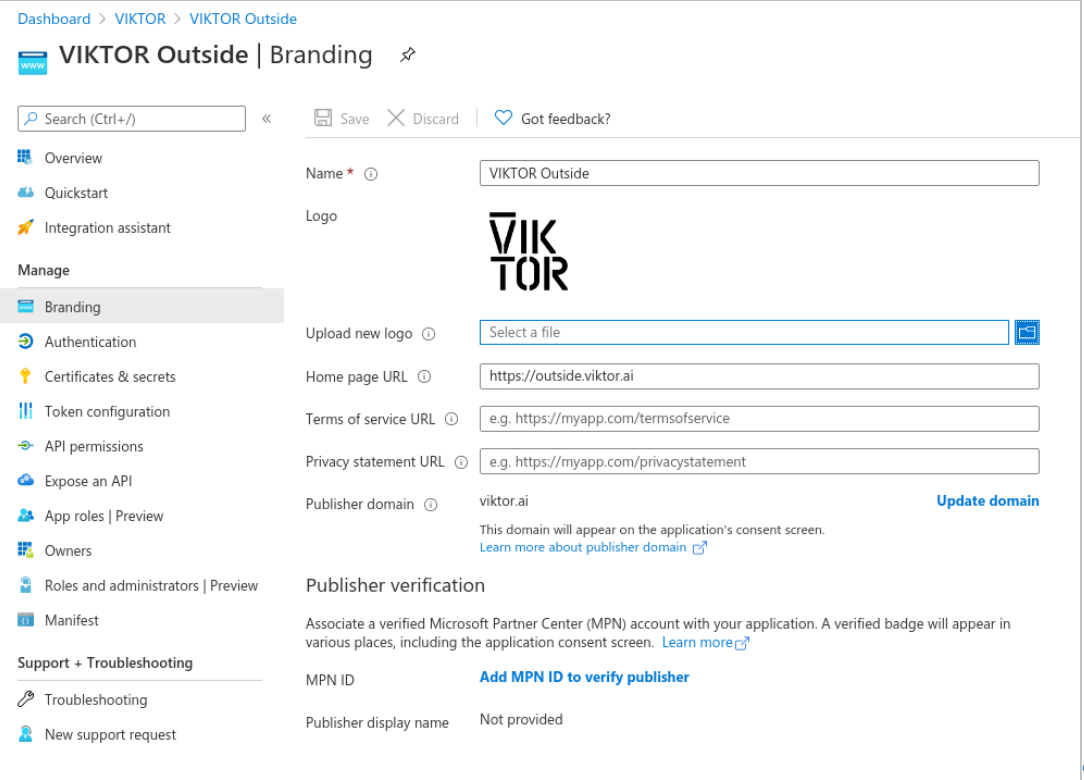
- Configure the application URL and logo
If you decide to make this application discoverable to your user via their Access Panel or the O365 app launcher, then
you may want to set up your application’s home page URL, to allow redirecting to the app, and logo. To do so go to
"Branding". Here we have configured our application’s Home page URL. This value should be your VIKTOR application
address https://{subdomain}.viktor.ai.
Should you choose to use the VIKTOR logo, you can save and upload our official logo.
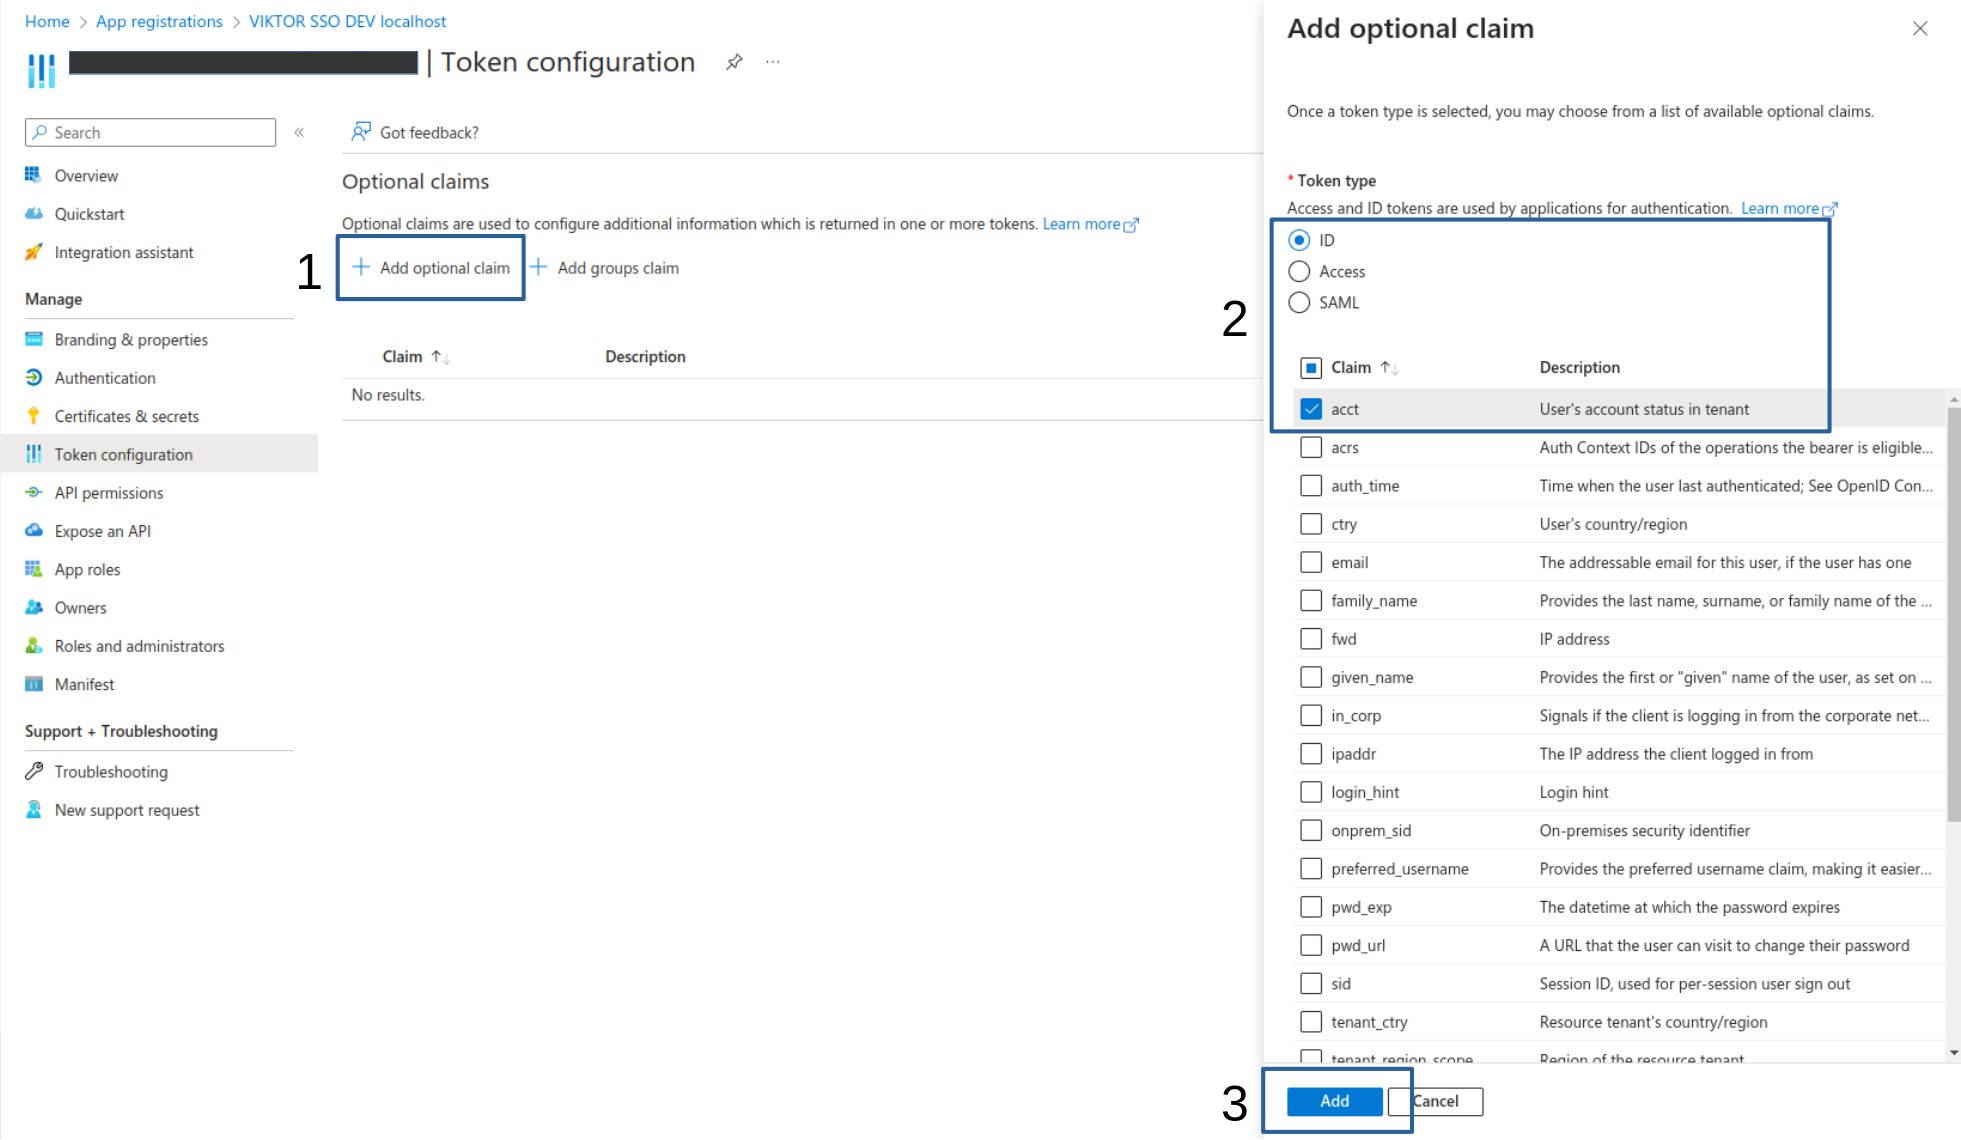
(Optional) Provision 'Guest' users with reduced access rights
It is possible to have new 'guest' users in Microsoft Entra ID added as external user to the VIKTOR environment. In order to do so, Microsoft Entra ID needs to include the user's account status in the claims.
Navigate to "Token Configuration", and click the "+ Add Optional Claim" button. For the Token type, select "ID", then under 'Claim' tick the "acct" option. Confirm your choices by clicking the "Add" button.
The guest role is set in VIKTOR when the user logs in for the first time. Updating the user role in VIKTOR at a later stage will permanently overwrite the setting. Modifying the account status in Microsoft Entra ID after the user has logged in to VIKTOR has no effect.
Set up the VIKTOR Application
Now that your application is ready on Microsoft Entra ID, we will need the information below to setup your VIKTOR application:
- Application (client) ID
- Directory (tenant) ID
- Client secret
- (Optional) Custom provider name label to be shown in the login button, instead of "Microsoft Entra ID" in "Log in with Microsoft Entra ID".
You can send this information via email to your contact person.
** Note: make sure to place the client secret in a file and lock it with password before sharing. Send the password separately, via SMS or phone call. **
If you have different policies for sharing password or secrets, feel free to follow them. In any case, do not send the secret as plain text.
Provision the Application
At this point the VIKTOR App is registered in your Microsoft Entra ID and can be used. To manage operational settings go to "Enterprise Applications" from the Microsoft Entra ID main page and search for "VIKTOR". Below you can find some settings you might want to consider.
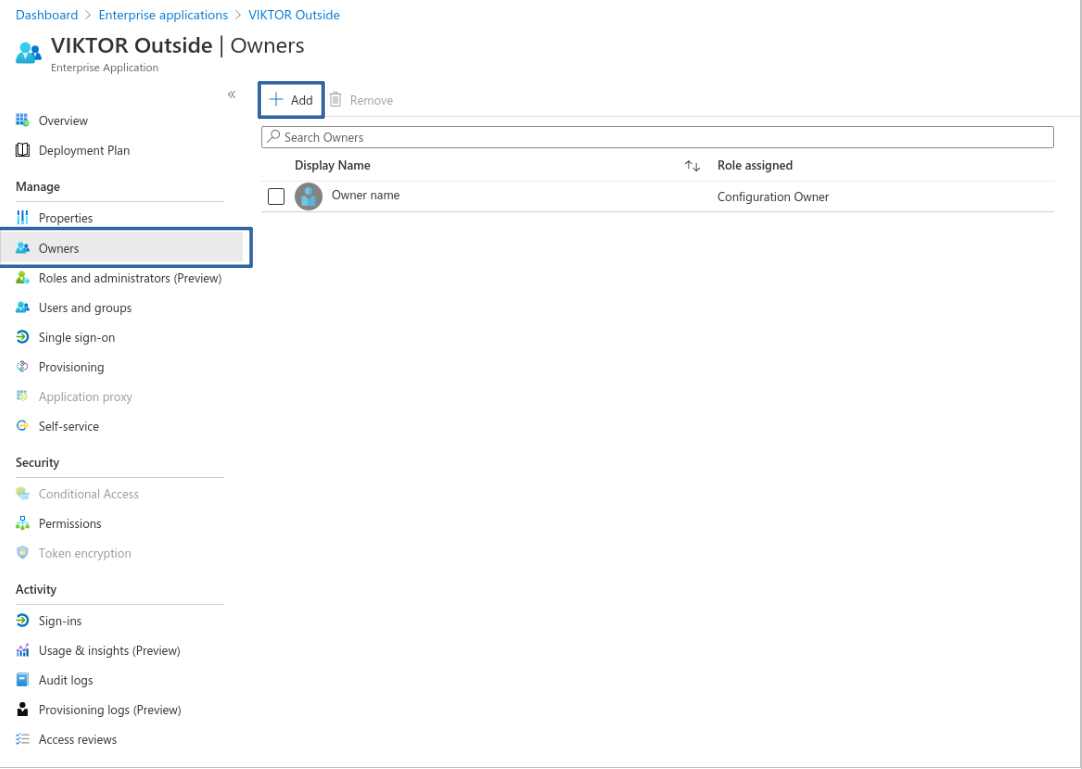
Assign application owners
To allow other users to configure and maintain the application, you can assign them as Owners. Go to Owners > Add and select the desired users.
Assign users to the application
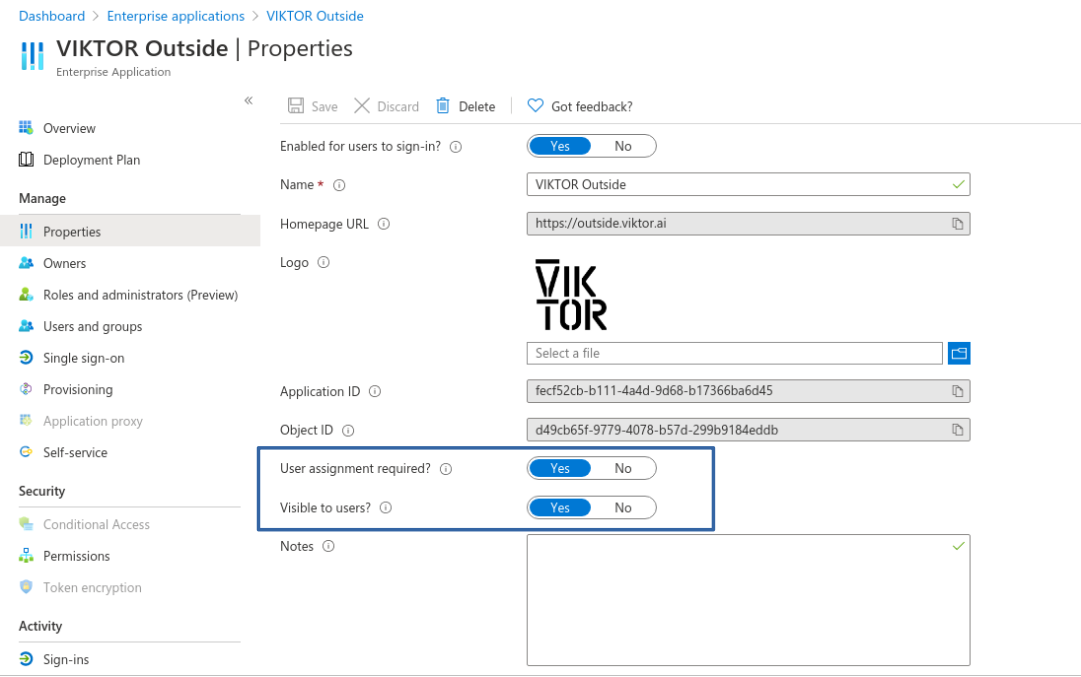
By default, your Microsoft Entra ID application will be configured to allow all your users to sign in. To allow only selected users to sign in, navigate to "Properties" and enable "User assignment required". If you want the application to be visible to the assigned users in their Access Panel and the O365 app launcher, also enable "Visible to users".
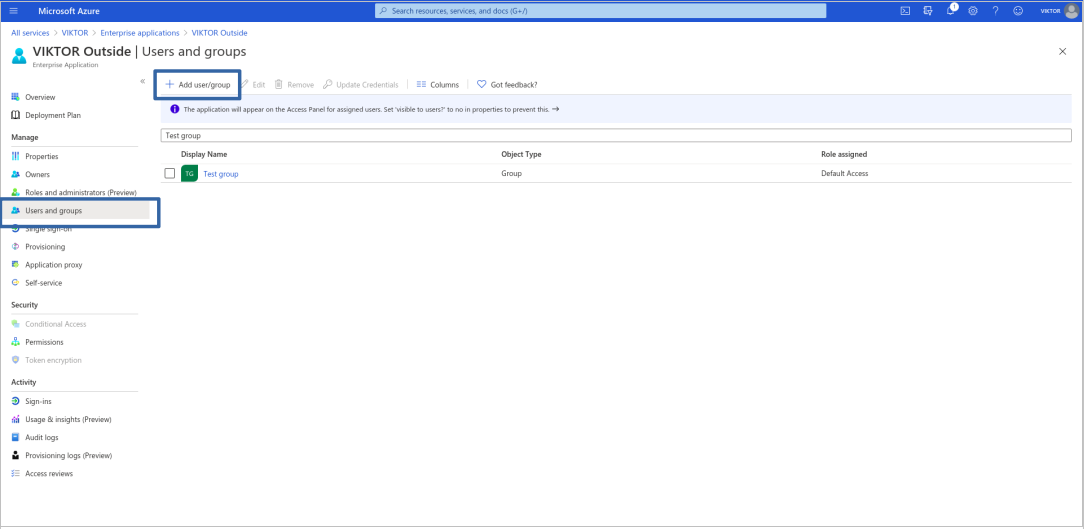
To assign users to your application, go to Users and groups > Add user and select the desired users.

For further information on how to set up user access follow this guide.
Enable self-service access
Self-service application access is a great way to allow users to self-discover your VIKTOR application from the My Apps portal. To allow your users to self-discover your VIKTOR application, you need to enable self-service application access first. A user who has requested access will be able to log in to the app only after his/her request has been approved.
Self-service application access is not available for guest users, only for members of your organization with a P1 or P2 license.
Setup your application
To enable self-service you first need to create a group and assign it to your application. All user that will be approved to use the application via self-service will land in this group, thus acquiring access for your application. First go to "Groups" from the Microsoft Entra ID main page and create a "New group". In our case, we created a group called "Test group". Then go back to the Microsoft Entra ID main page, select "Enterprise applications", find your "VIKTOR" application and open "Users and groups". From this screen, assign the group you just created to your application, as shown below.
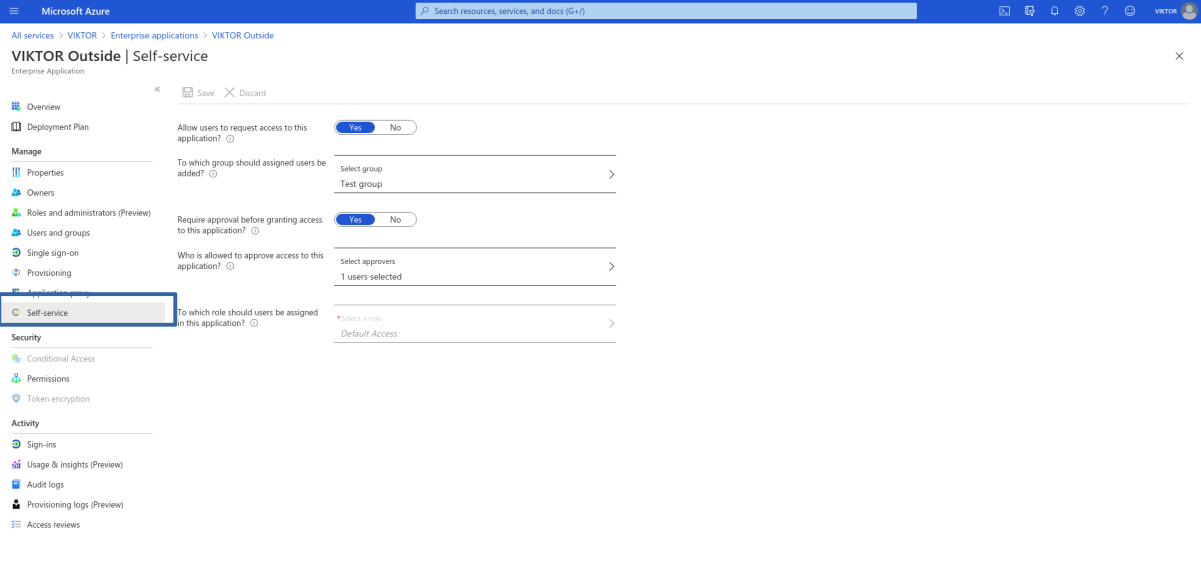
Next, go to "Self-service". From here you can:
- enable the self-service for your application
- select the group where the users will land once they get access
- select whether approval will be required before the user is able to login
- select the users responsible for approving self-service requests
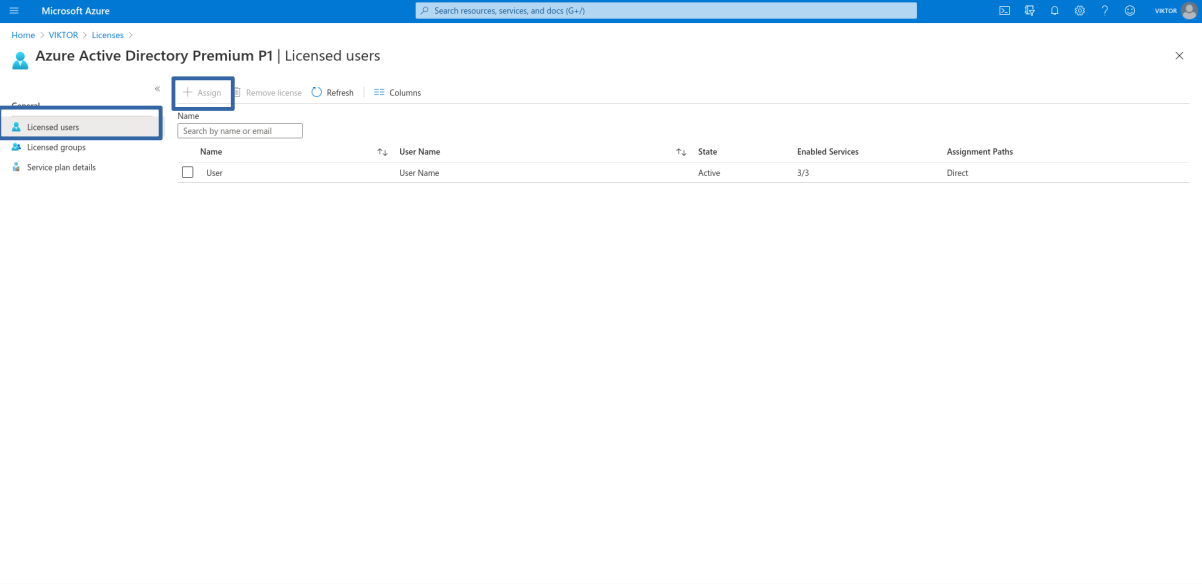
To allow a member of your organization to self-service you need to assign a P1 or P2 license to them. From the Microsoft Entra ID main page, go to Licenses –> All products, select your "Microsoft Entra ID Premium P1" or "Microsoft Entra ID Premium P2" license, click "Assign" and select your users.
Alternatively, you can assign the licenses via your Microsoft 365 admin center.
The self-service flow in action
After setting up self-service in your application, you have now enabled your users to request for application access via their My Apps page. By clicking on "Add self-service apps", they will see a list of application they can request access for, like shown below.

The user assigned to approve the self-service request will get an email for the application access requested by the user, like the one shown below. Approving the request will allow the user to login to the application.
