Creating a tree-type app
In this tutorial we will create an application that implements a 'tree' entity type hierarchy, consisting of two
entity types (with parent-child relation). The child entity type
allows the user to click on a map to define a GeoPoint. The parent entity type collects the locations on each child
entity and shows them together on a single map, making use of the API.
The end result can be downloaded here.
For more examples of applications, please visit the sample apps
Creating an empty app
A template 'tree' type app can be generated using the CLI. We will use this template app as a starting point for the
tutorial. Run the following command (replace tree-tutorial with the folder name of your choice):
viktor-cli create-app --app-type tree tree-tutorial
Folder structure
The app has the following folder structure:
tree-tutorial
├── app
│   ├── my_entity_type
│   │   ├── __init__.py
│   │   └── controller.py
│   ├── my_folder
│   │   ├── __init__.py
│   │   └── controller.py
│   └── __init__.py
├── CHANGELOG.md
├── README.md
├── requirements.txt
├── tests
│   └── __init__.py
└── viktor.config.toml
Note that the app type ('tree') has been defined in viktor.config.toml:
app_type = 'tree'
To keep things simple, we will stick to the current entity type and corresponding folder names within this tutorial.
Installation
Now run the clean-start command from within the folder to install the app and its dependencies, and start the app:
viktor-cli clean-start
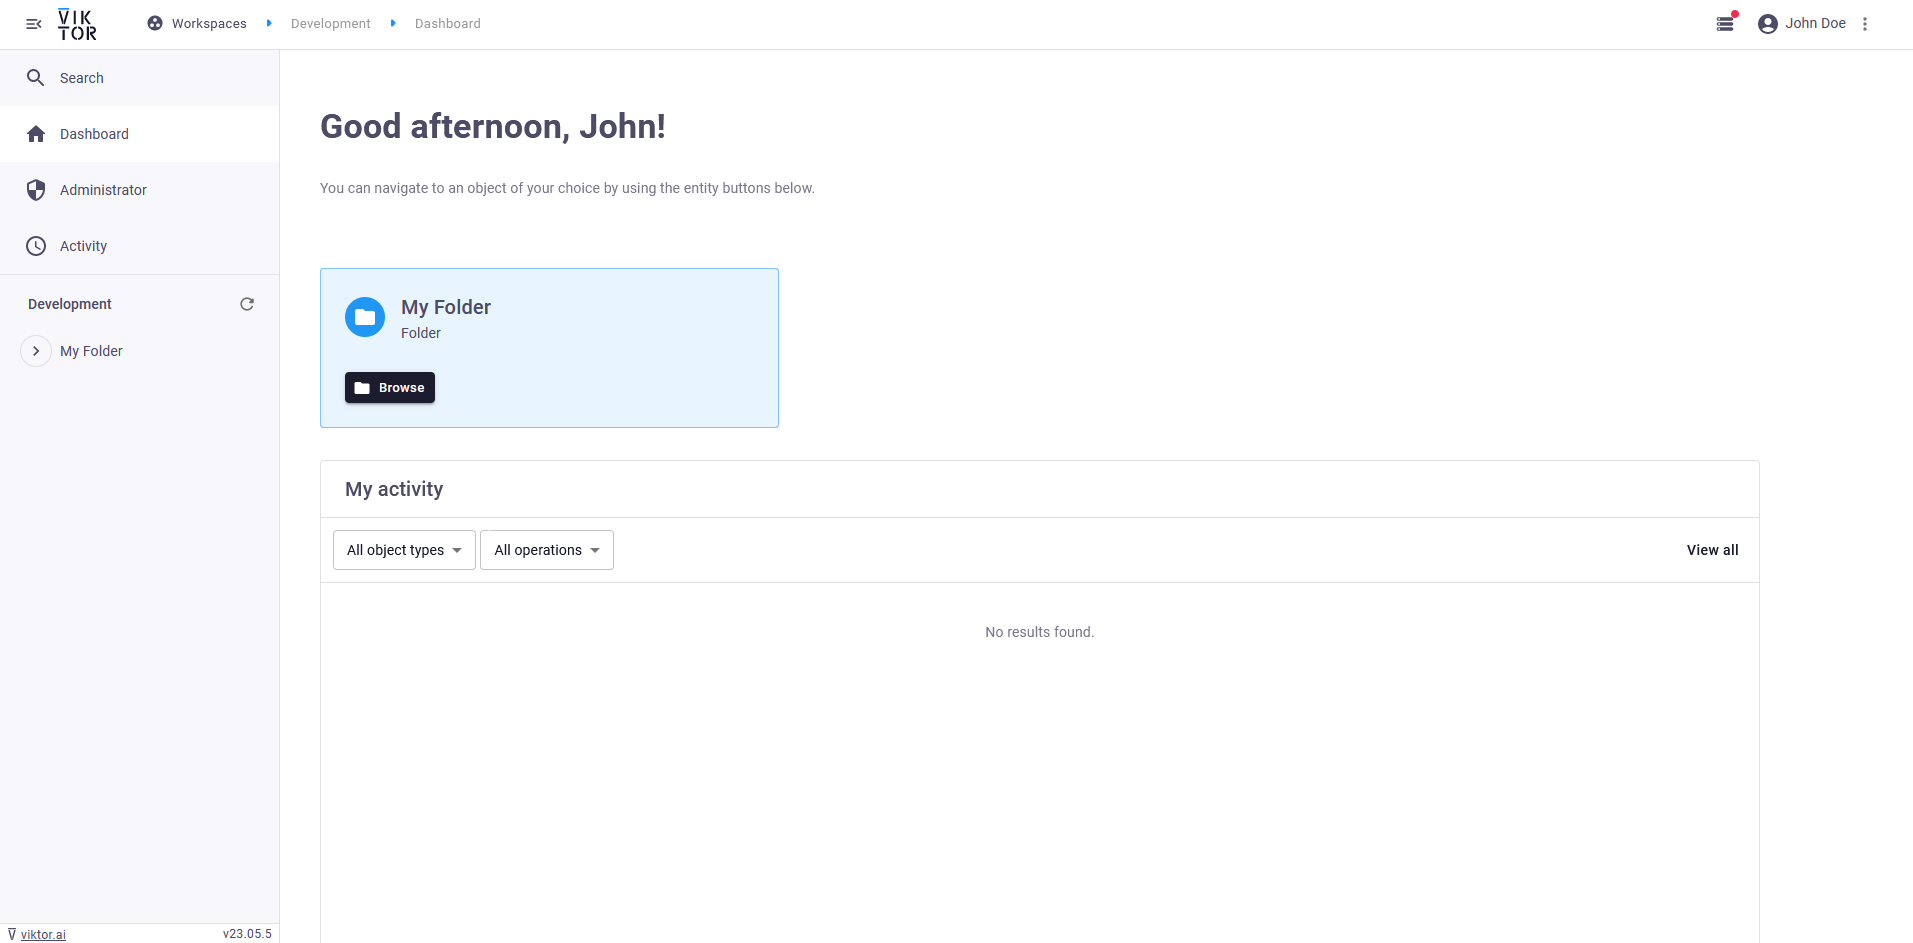
Login to the app in your browser to verify that the app is installed and running as expected. You will be redirected to the app's dashboard.
If you see the "Workspaces" menu upon logging in, click the "Open" button on the "Development" workspace. After opening, you will be redirected to the app's dashboard.
The tree-type app generated by the CLI consists of a top folder, called "My Folder", shown in the sidebar on the left side of the screen.
Click "My Folder" to enter the folder. Now, let's add a new object by clicking the + (create new object) button on the right side of the screen. You'll now see a menu where you can add a new object:
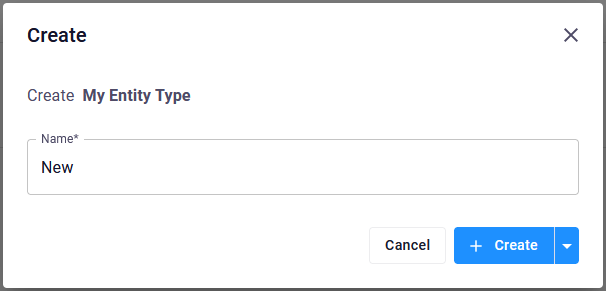 Create a new object of type "My Entity Type"
Provide a name for the new object and click "Create and open", to create the new object and automatically navigate to the object's editor (it should be empty). From here, you can navigate back to "My Folder" in a few different ways:
-
By clicking the back button in the top right side of the screen:

-
By clicking the menu button in the top left corner of the screen. This will extend (or collapse) the side menu. You can expand "My Folder" to see all containing objects, or click on it:

-
By clicking the breadcrumbs at the top of the screen:

Delete the created entity afterwards.
Defining the GeoPoint (child)
Let's modify MyEntityType so that the user can define a GeoPoint on a map. Open app/my_entity_type/controller.py
and replace it with the following code:
from viktor import ViktorController
from viktor.parametrization import ViktorParametrization, GeoPointField
from viktor.views import MapView, MapResult, MapPoint


class Parametrization(ViktorParametrization):
    geo_point = GeoPointField("Select point")


class Controller(ViktorController):
    label = 'My geo-point'
    parametrization = Parametrization

    @MapView("Map", duration_guess=1)
    def map_view(self, params, **kwargs):
        features = []

        if params.geo_point:
            features.append(MapPoint.from_geo_point(params.geo_point))

        return MapResult(features)
In your browser, open "My Folder" and create a few entities of type "My geo-point". Don't forget to select a point on the map for each of them and save (including the entity created at the start of this tutorial, if you did not delete it before).
Defining the Overview (parent)
To show all the geo-points we just created, let's modify MyFolder to iterate over all its children and obtain the
point from the params for each of them. Open app/my_folder/controller.py and replace it with the following code:
from viktor import ViktorController
from viktor.api_v1 import API
from viktor.views import MapView, MapResult, MapPoint


class Controller(ViktorController):
    label = 'Overview'
    children = ['MyEntityType']
    show_children_as = 'Table'

    @MapView("Map", duration_guess=1)
    def map_view(self, params, entity_id, **kwargs):
        features = []

        for child in API().get_entity(entity_id).children():
            point = child.last_saved_params.geo_point

            if point:
                features.append(MapPoint.from_geo_point(point))

        return MapResult(features)
In your browser, open the editor of "My Folder". Within the "Map" view, click the 3 dots and select "Center map", to fit all objects within the view. You should now be able to see all your previously created geo-points.